


FREE GUIDE
Build Your Dream Telecalling Team
Get your copy of the ultimate guide to lead generation through telecalling (scripts included)
Ready to unlock the secrets of successful lead forms?
In this article, we will dive into the ultimate step-by-step guide to creating lead forms, so you can attract the right customers effortlessly!
Are you ready to boost your business by capturing valuable leads through Facebook? Creating a lead form is a crucial step in achieving this.
Follow these simple steps to create your own lead form:
 Begin your journey to creating a lead form by logging into Business.Facebook.com.
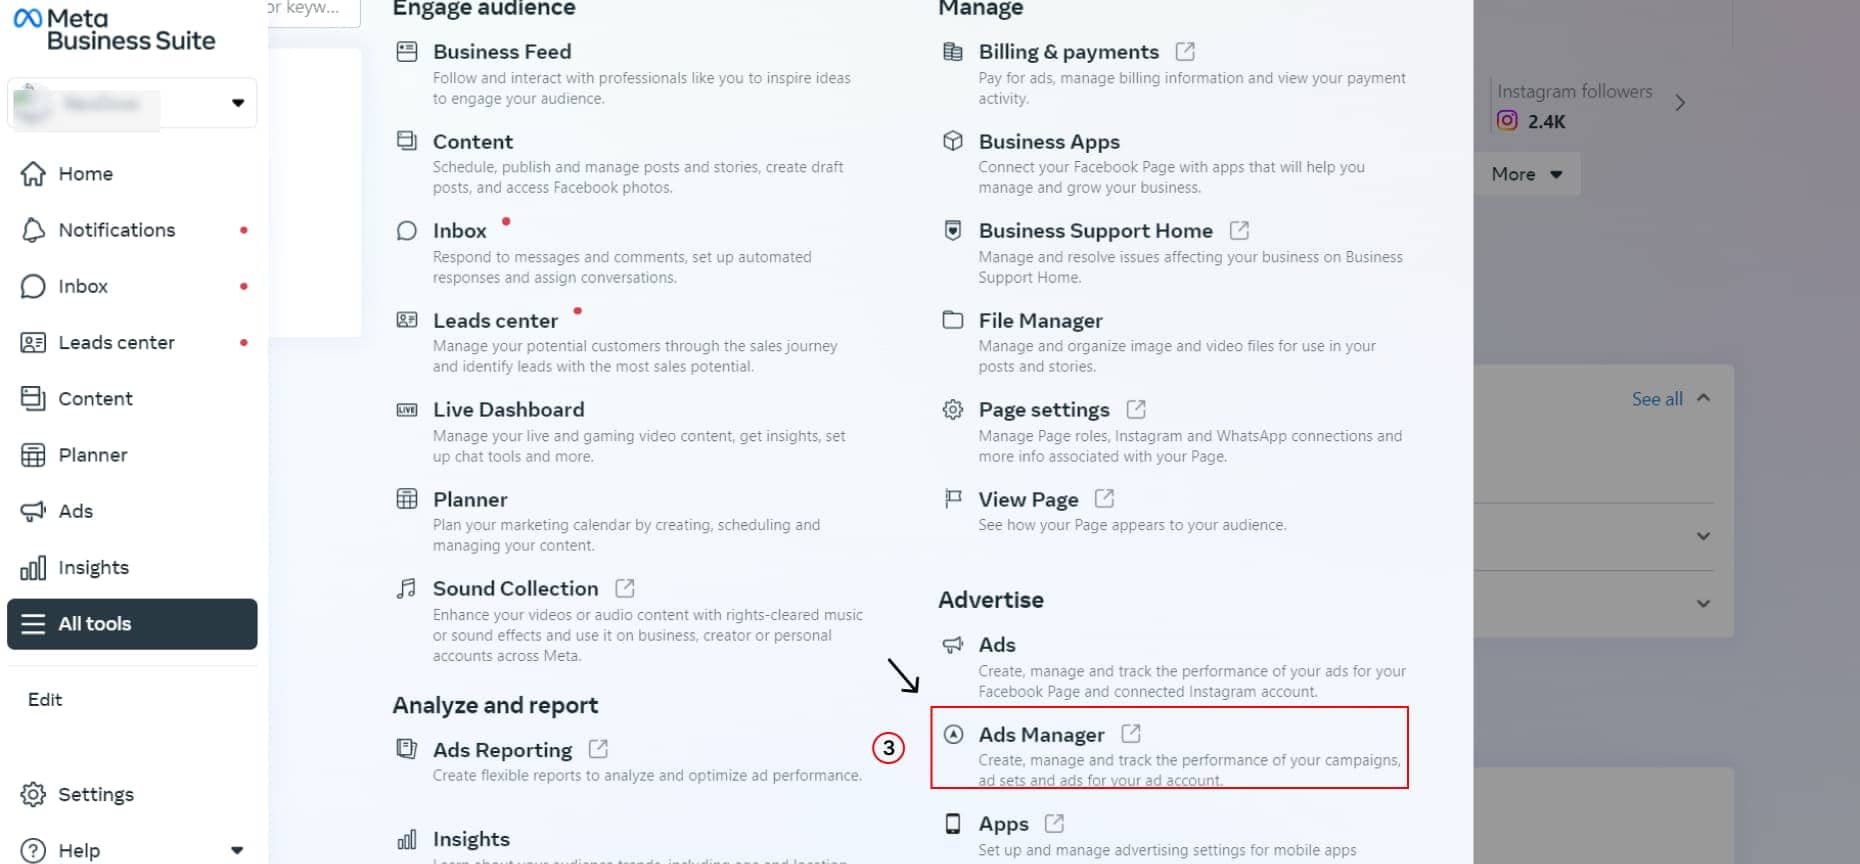
After logging in, go to ‘All Tools’. This is where you’ll access the essential tools to manage your advertising campaigns effectively.
Now, navigate to Ads Manager. This is where you’ll find a suite of powerful tools to design, launch, and track your ad campaigns.

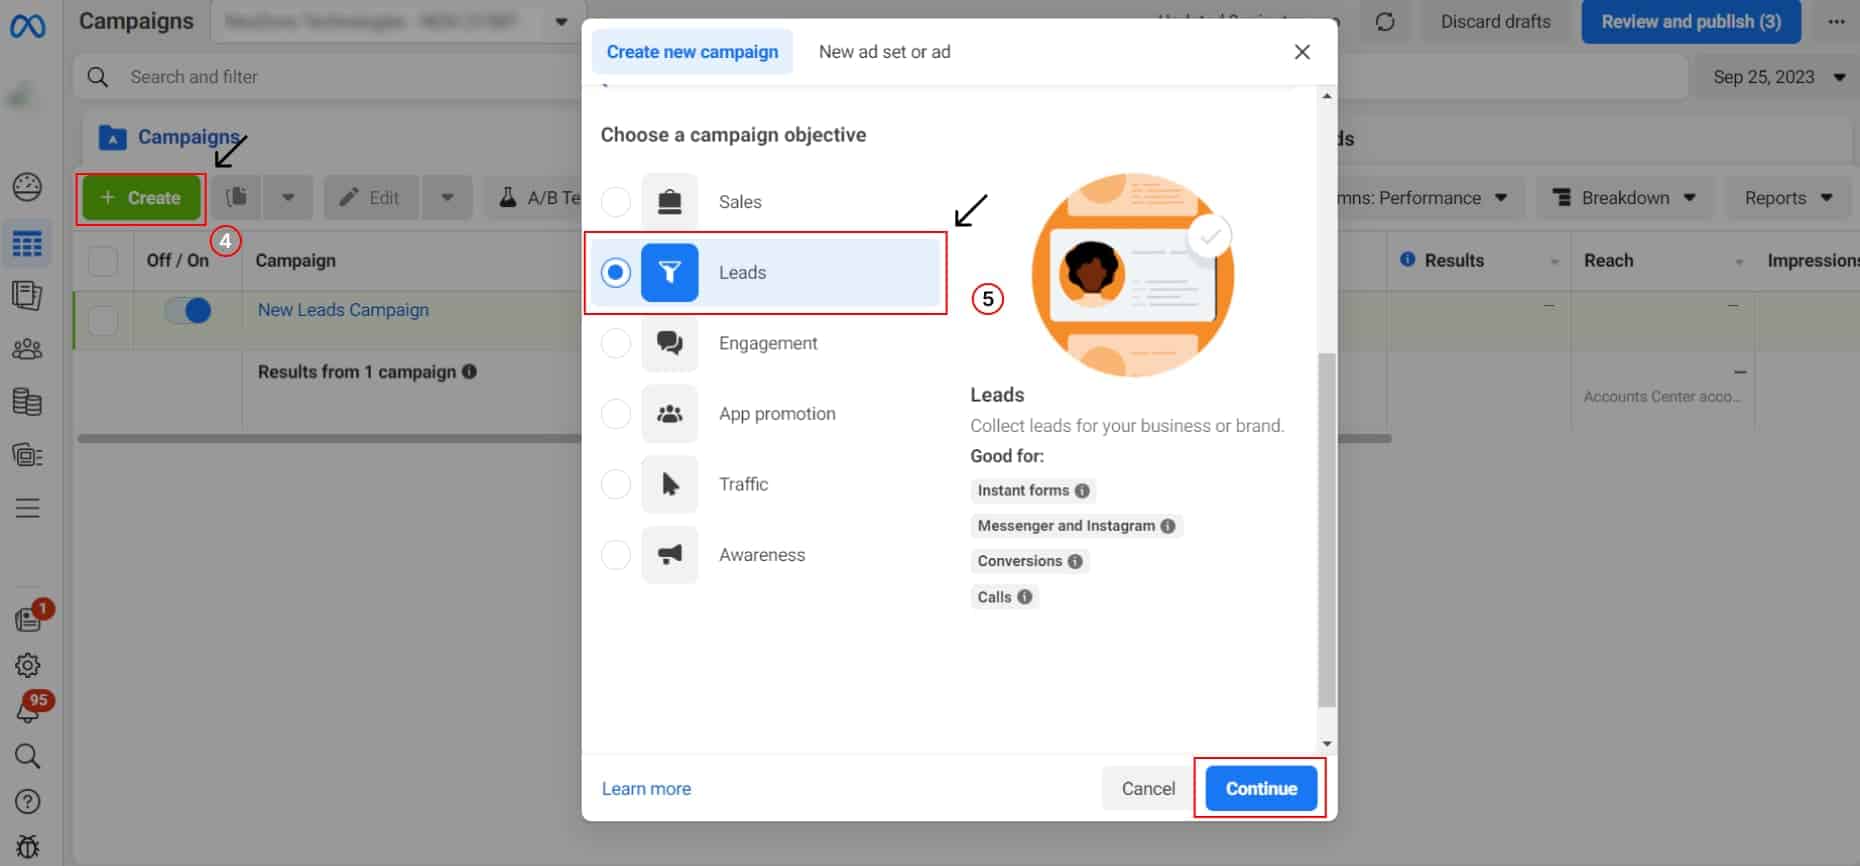
In Ads Manager, locate and click on the ‘Create’ button. This action will initiate the process of crafting your lead form.
Now, you’ll need to select your campaign objective. Since you want to create a lead form, choose ‘leads’ as your objective. Click ‘Continue’ to proceed.
Check out: How to create Facebook Business Manager Account
Here’s where you provide the specifics of your campaign. Set your budget, choose a name that reflects your campaign’s purpose, and define your target audience.
Step 6 – Go to Ad Set Level
Once you’ve set your campaign objective, navigate to the Ad Set Level. Here, you’ll fine-tune the location from which you want to generate leads.
Choose wisely, as this step ensures your leads are coming from the right place.
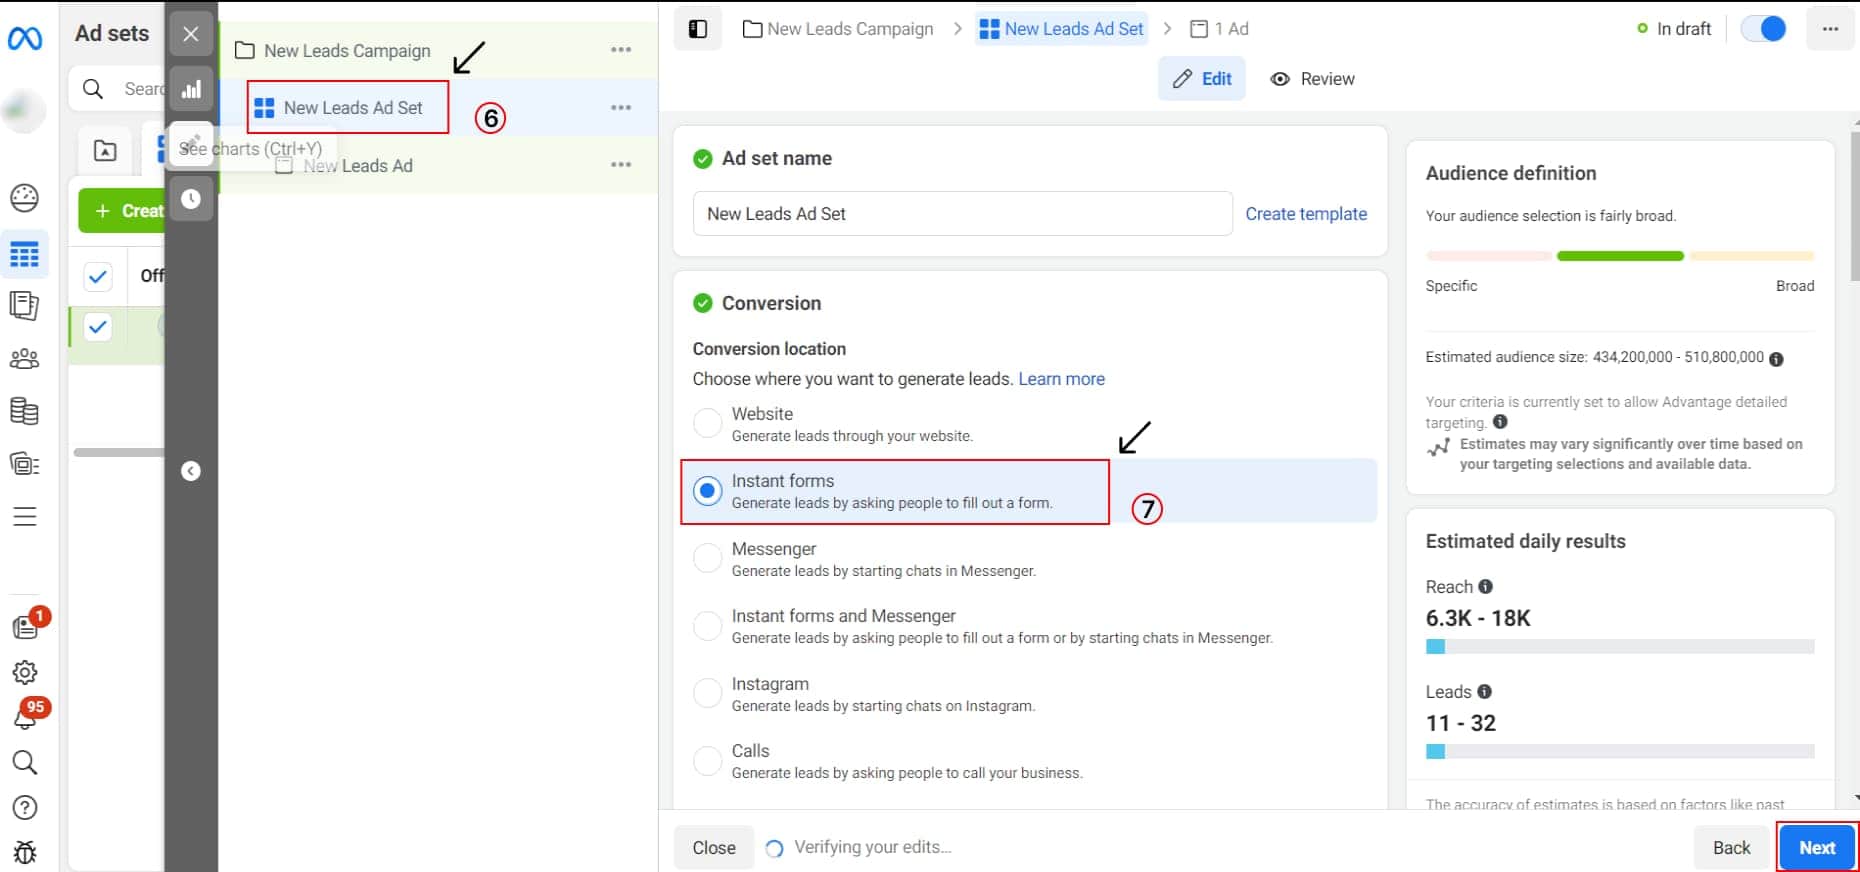
Step 7 – Click on Instant Forms
After selecting your conversion location, click on ‘Instant Forms.’ This is where you’ll start building the foundation of your lead generation campaign. Begin by defining your target audience, a crucial aspect of successful lead generation.
Step 8 – Proceed to the Ad Level
Now, head to the Ad Level, where you’ll finalize your lead form creation. Locate the ‘Create a Form’ button and click it. This action will lead you to the heart of your lead generation campaign.
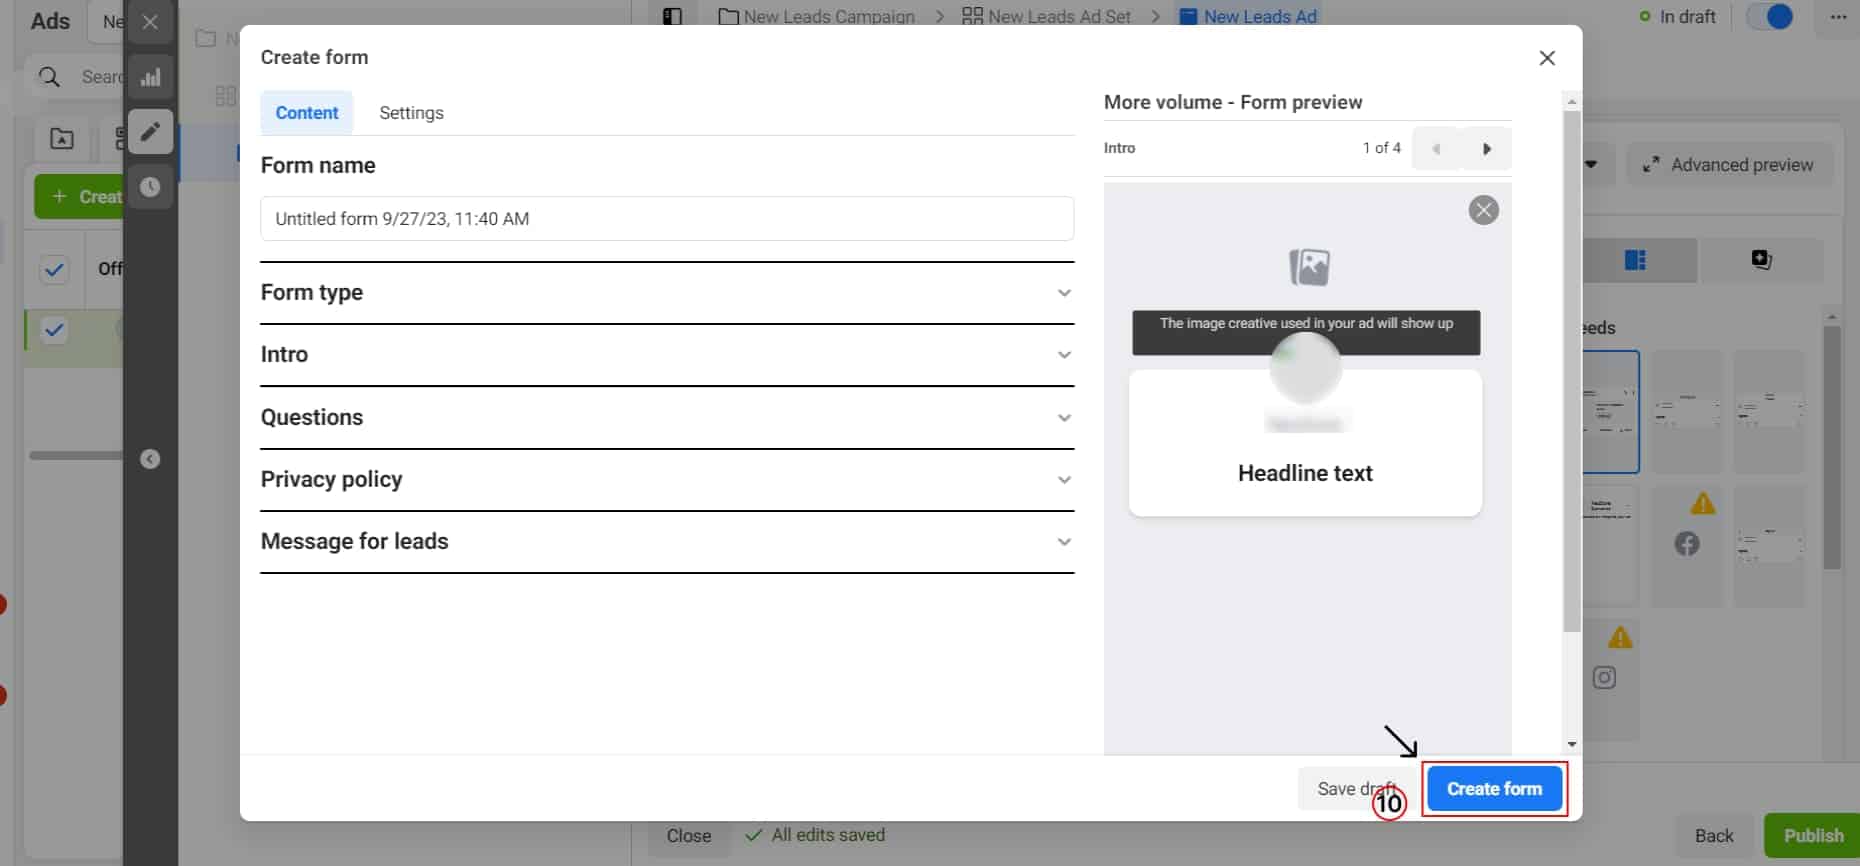
Step 9 – Craft Your Lead Form
In this step, you’ll define the specifics of your lead form. Start by filling in the necessary form details, including selecting your preferred form type—options include ‘More Volume,’ ‘Higher Intent,’ and ‘Rich Creative.’
Next, create a compelling introduction to your lead form to capture users’ attention. Follow this with well-thought-out questions that will help you gather valuable information from your leads.
Click on ‘Create a Form’ to finalize your lead form. Once you’ve done this, you’re ready to use it in your campaign. Head back to the Ad Level to see your form and make any necessary adjustments.
When you’re satisfied, it’s time to launch your campaigns and preview your form in action.
Also Read: How to verify your Facebook Business Manager
Creating a lead form on Facebook doesn’t have to be a daunting task. With this ultimate guide, you’ve unlocked the secrets to crafting an effective tool for capturing leads and growing your business.
Remember, it all begins with setting the right campaign objective and refining your target audience.
As you launch your campaigns and see your lead form in action, you’ll witness firsthand how this simple yet powerful tool can transform your business. So, go ahead, create your Facebook lead form, and embark on your journey to success!


Book a free demo and see how you can close more deals, faster!
![]()


95% business who use NeoDove report 3x more profits!
Happy Customers
107k reviews

These outcomes and beyond can be yours.
Lead Leakage
Increase in call attempts
More Engagement


FREE GUIDE
Get your copy of the ultimate guide to lead generation through telecalling (scripts included)