


FREE GUIDE
Build Your Dream Telecalling Team
Get your copy of the ultimate guide to lead generation through telecalling (scripts included)
Are you ready to take your customer relationship management to the next level?
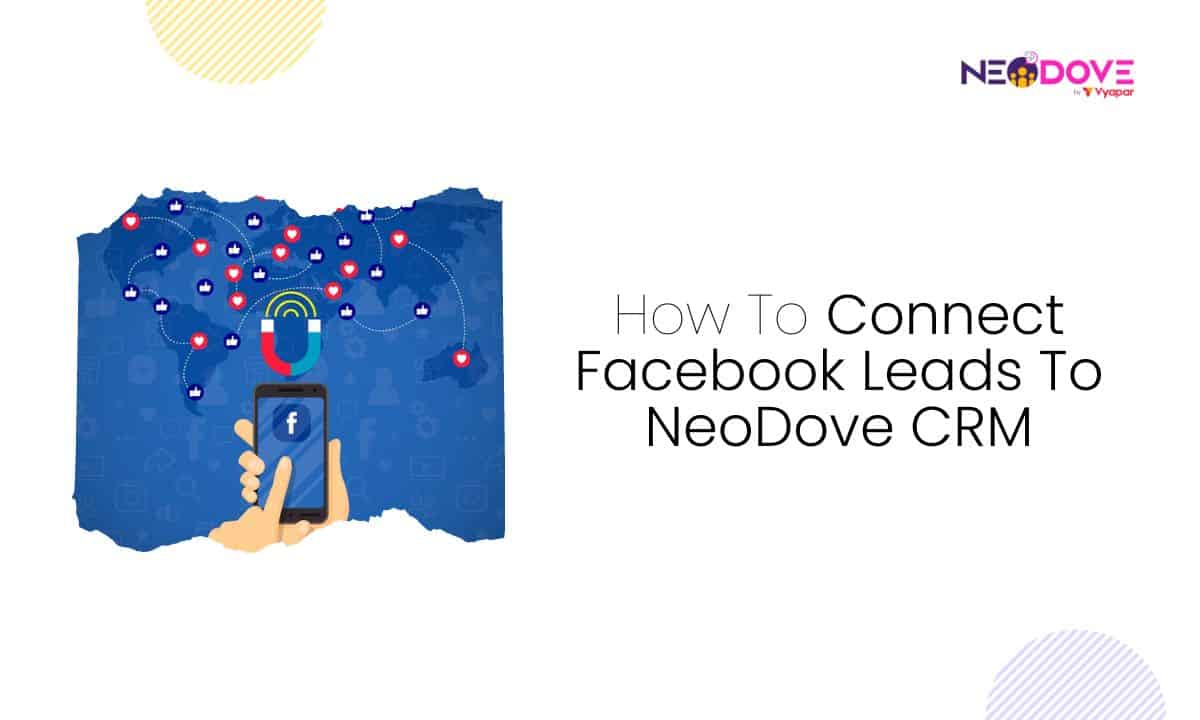
Connecting Facebook leads to NeoDove CRM is your golden ticket!
In a world where staying connected matters more than ever, connecting Facebook leads to NeoDove CRM can revolutionize lead management.
In this article, we will guide you through the process of connecting Facebook leads to NeoDove CRM with ease.
Now, let’s dive in and make those Facebook leads work wonders for your business with NeoDove CRM!
Connecting Facebook leads to NeoDove is your ticket to efficient communication and enhanced customer relationship management.
Let’s explore the steps involved to connect Facebook leads to NeoDove:
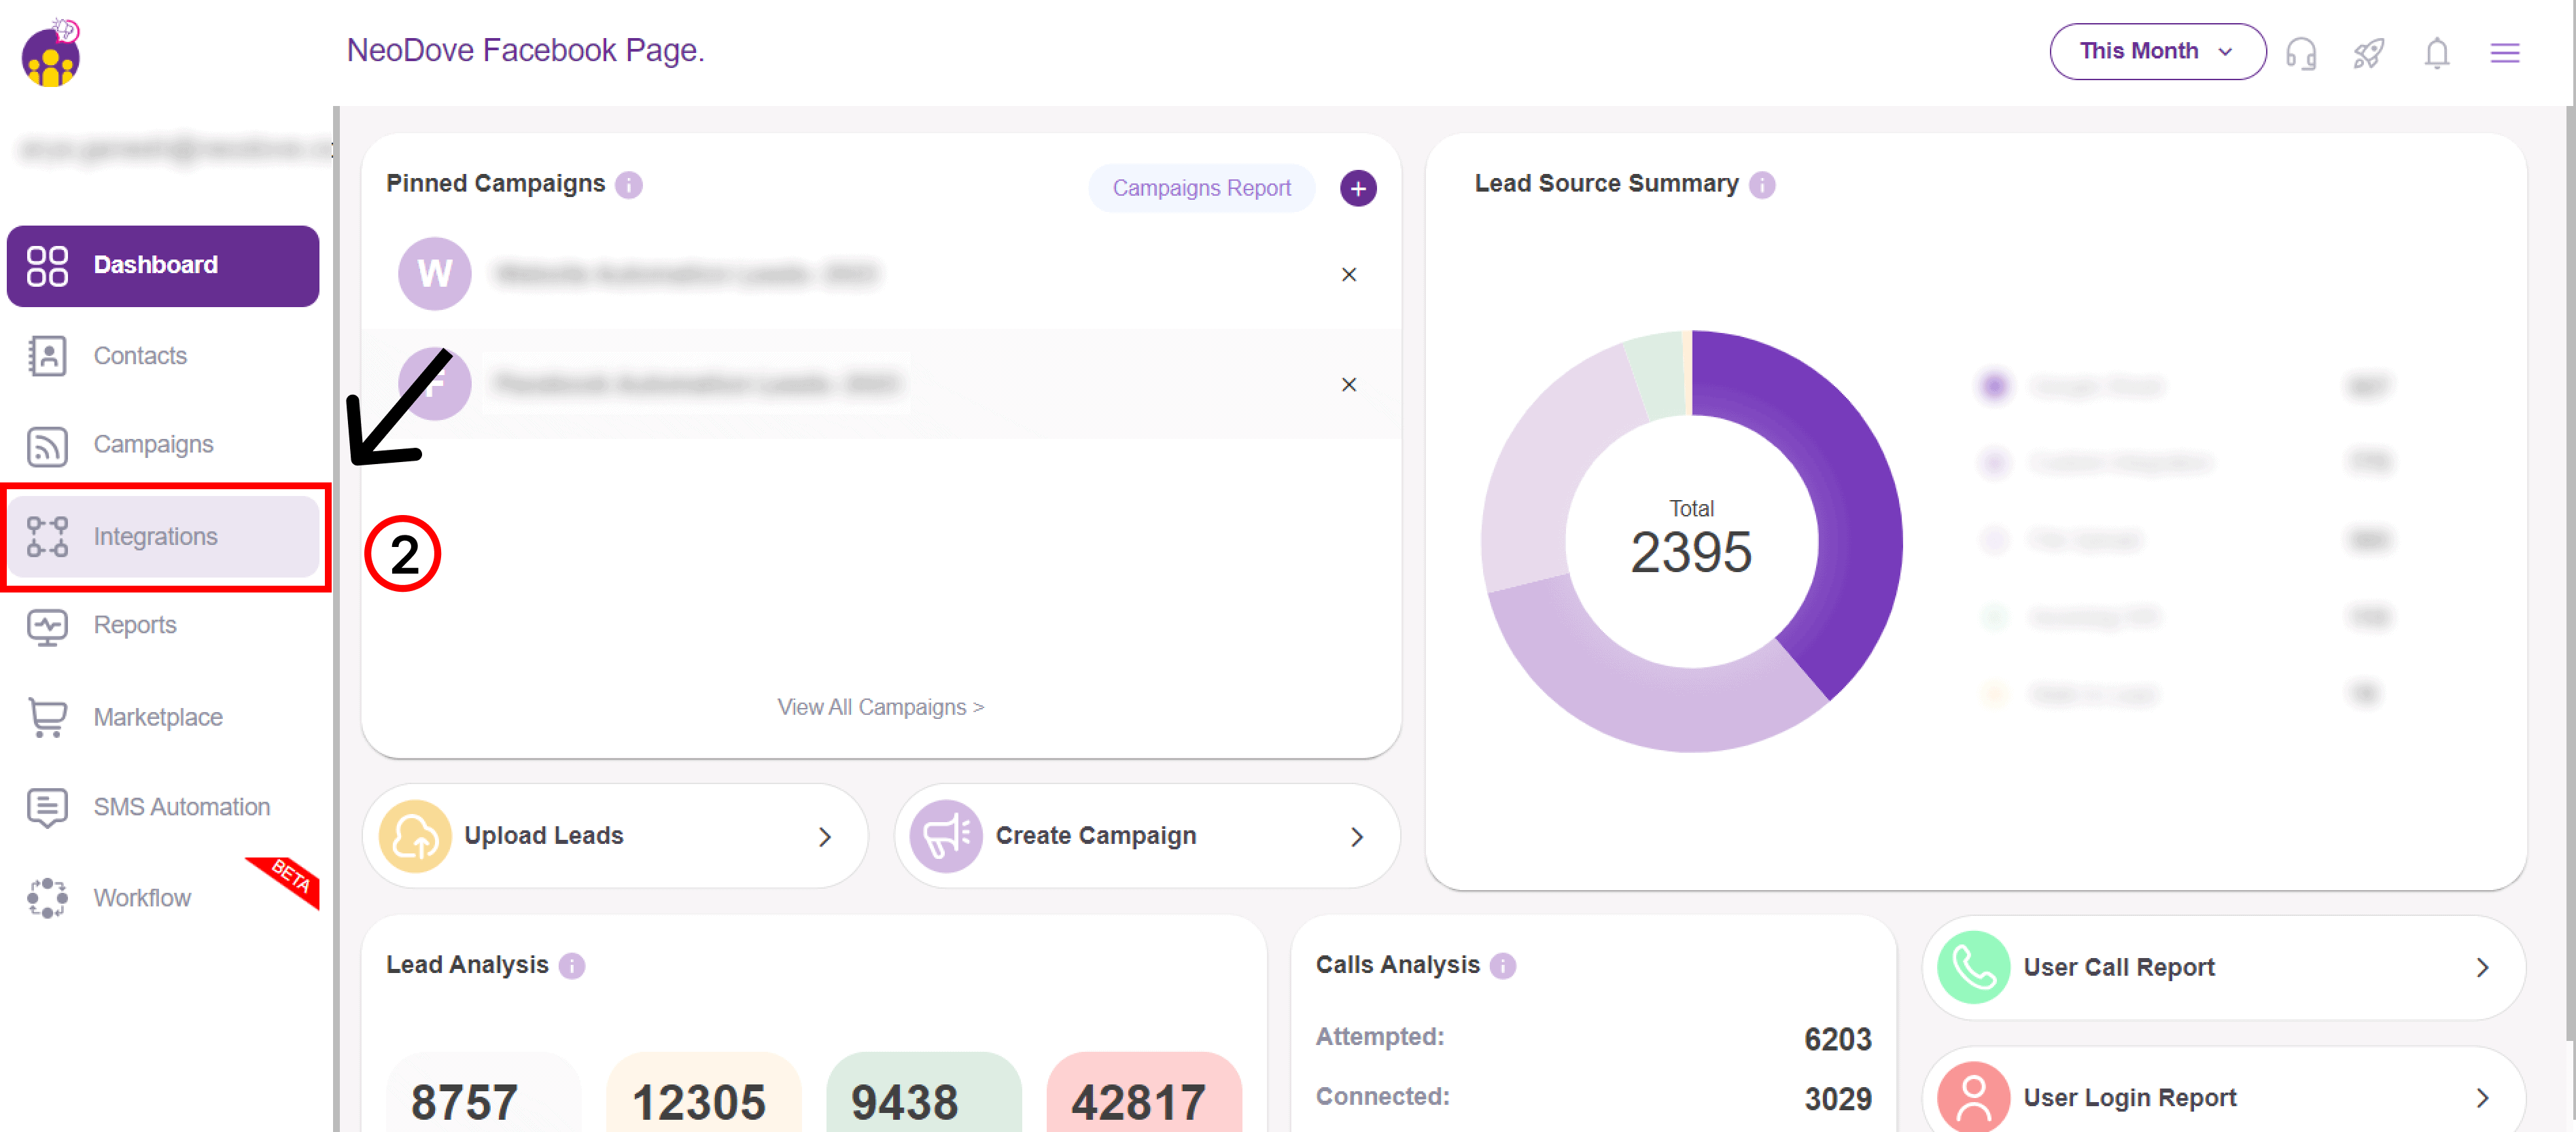
First things first, you will have to log into your NeoDove Telecalling CRM account.
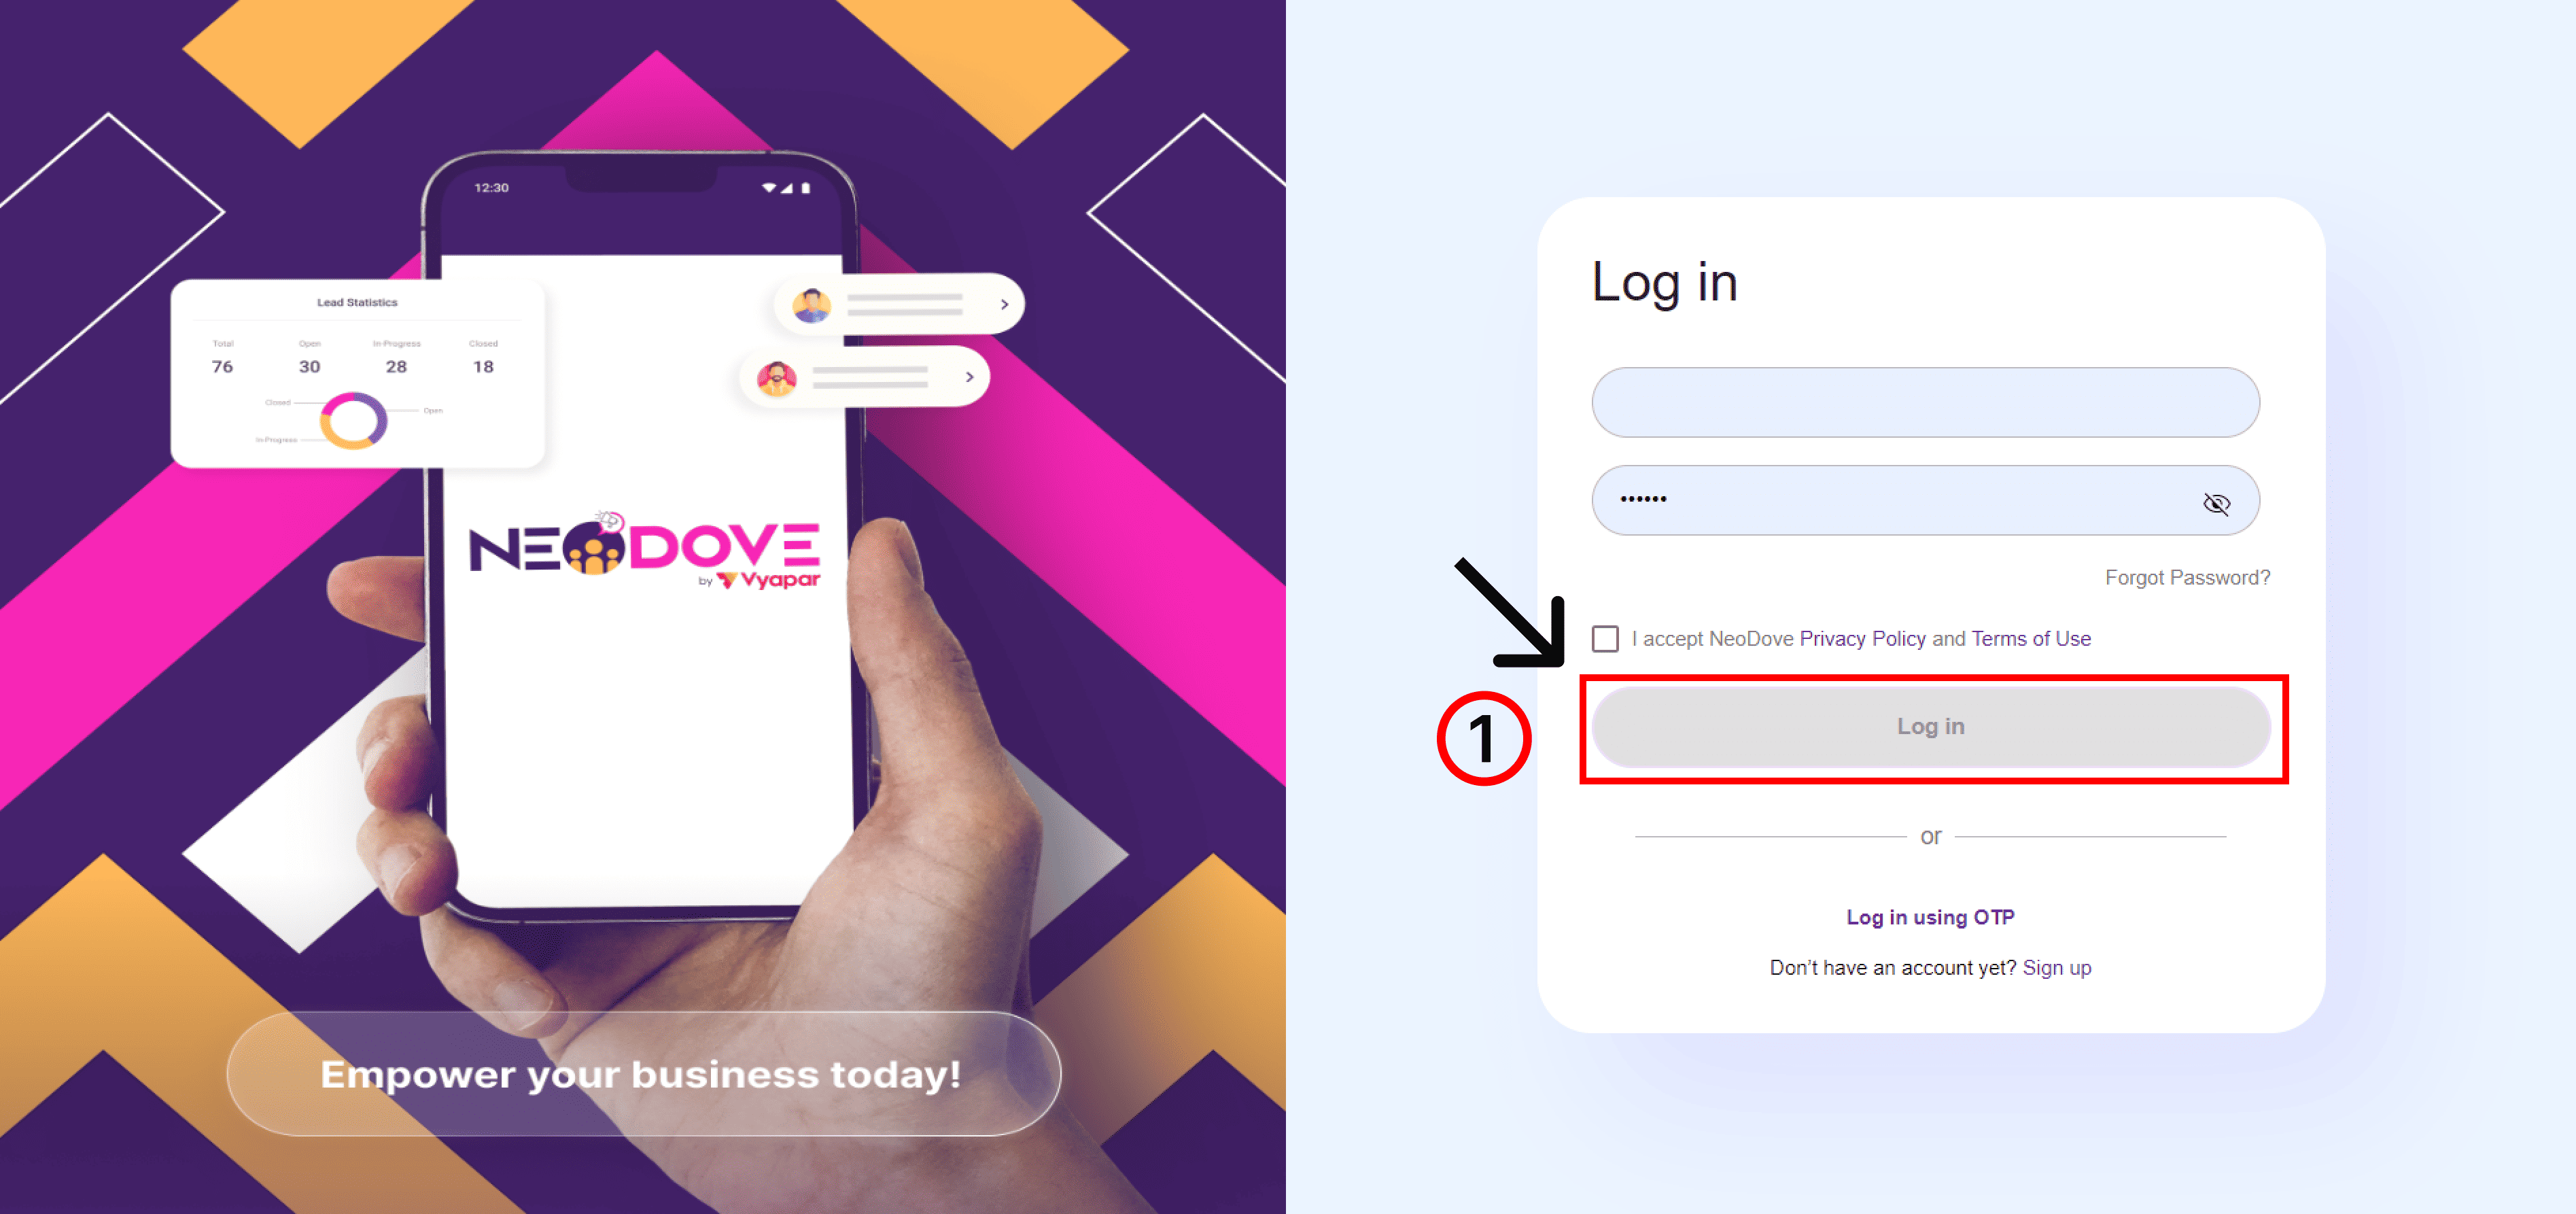
On the left-hand side, you will see a list of options. Find and click on ‘Integrations’. Now, you will be sent to the Integrations page.
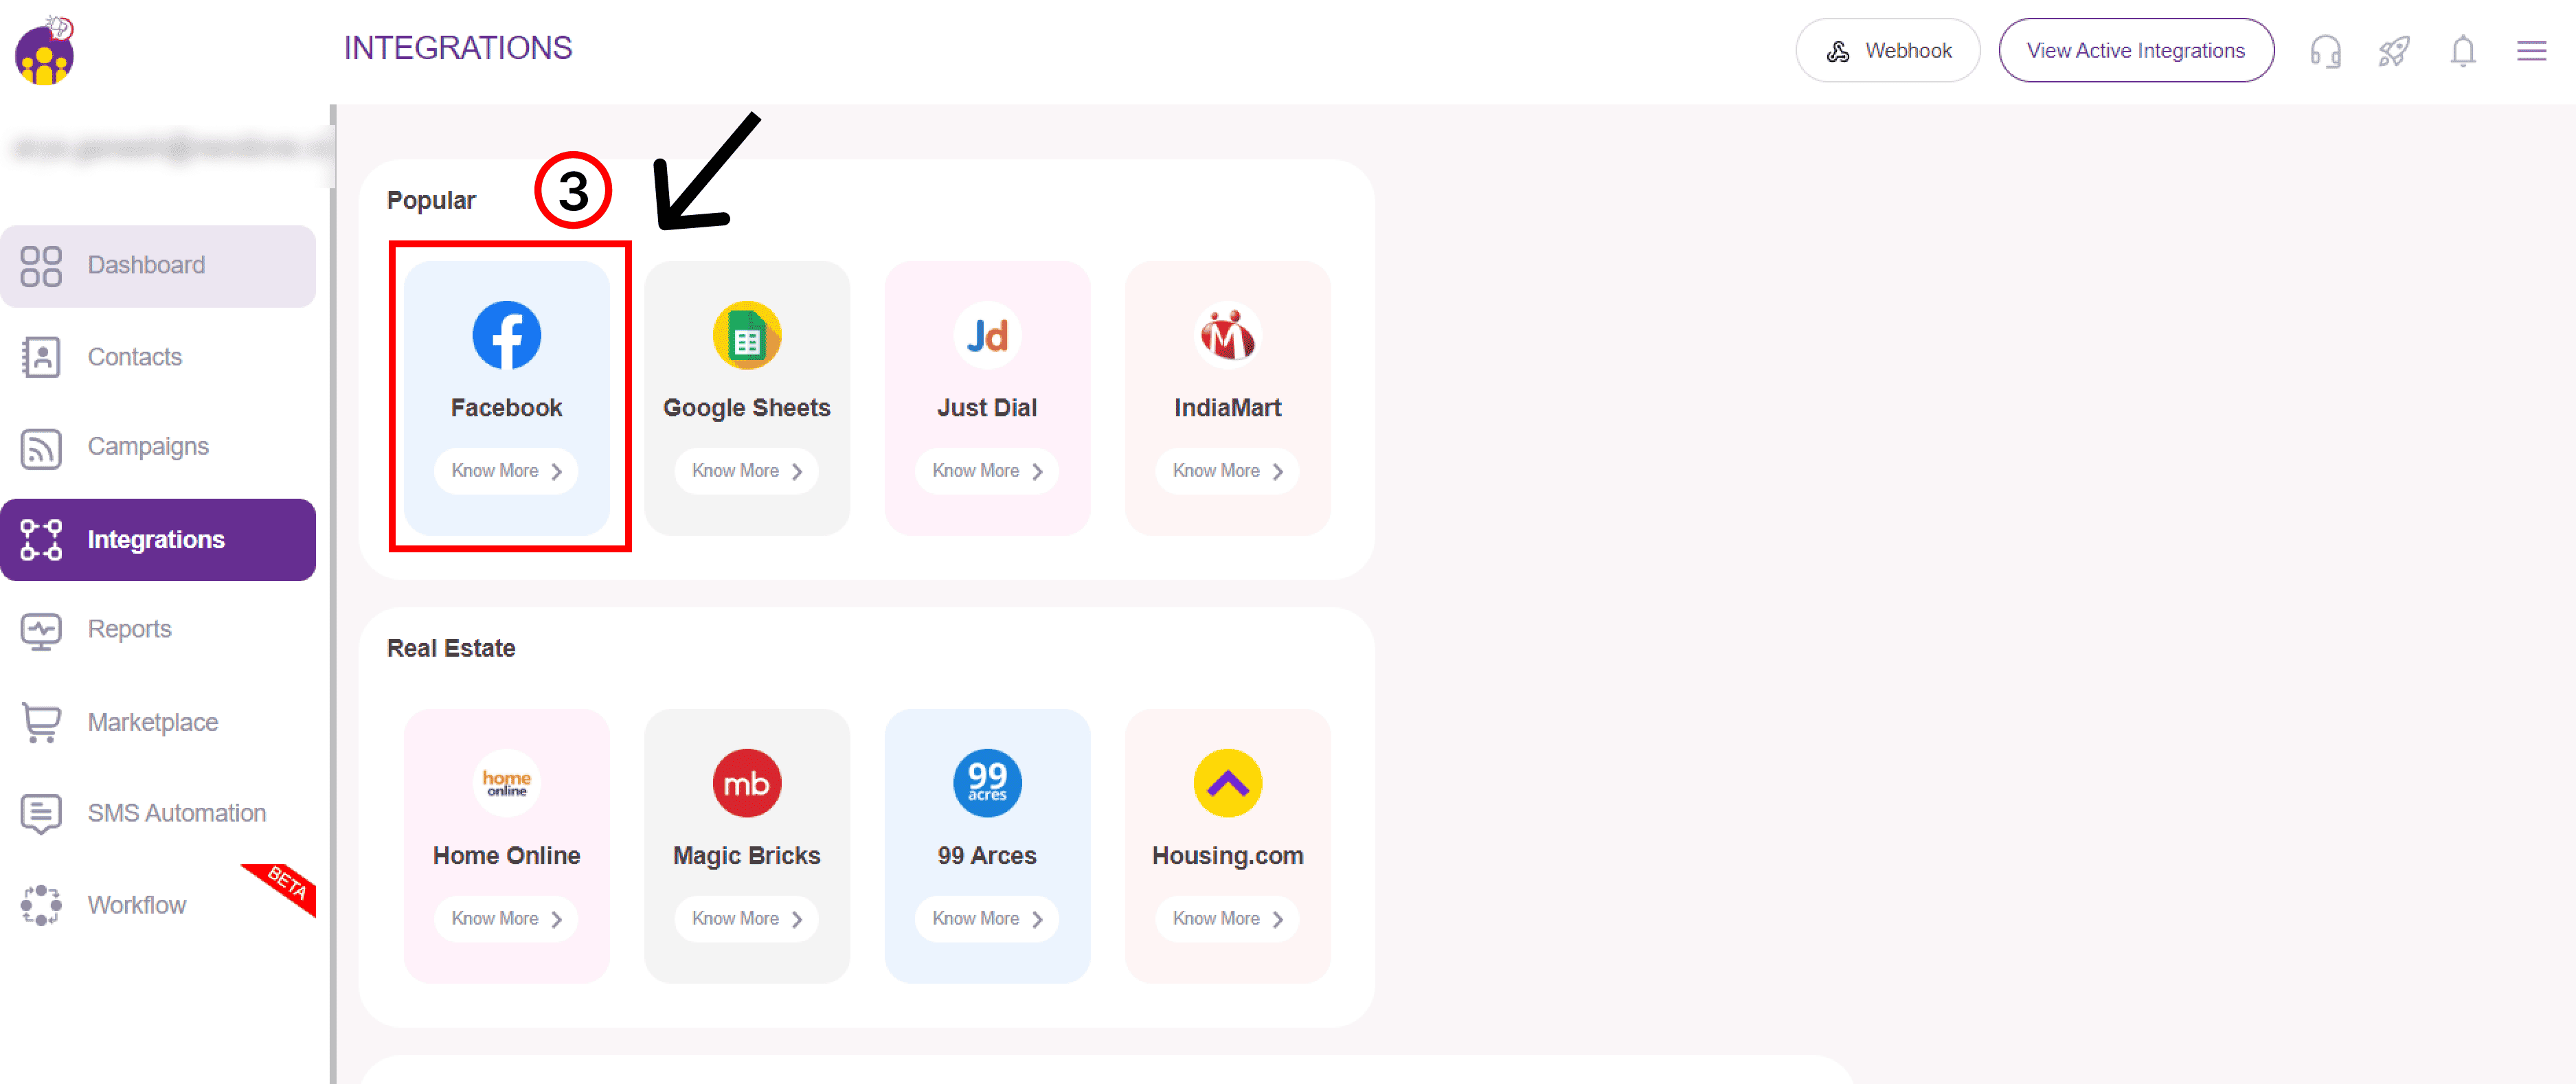
Here, you must click on the ‘Facebook Ads’ option in the Add new integration section.
You will then be shown multiple campaign-based options. You can choose to create a campaign, add leads in existing campaigns or add leads based on set conditions.
Select Create a new campaign. Choose your campaign type.
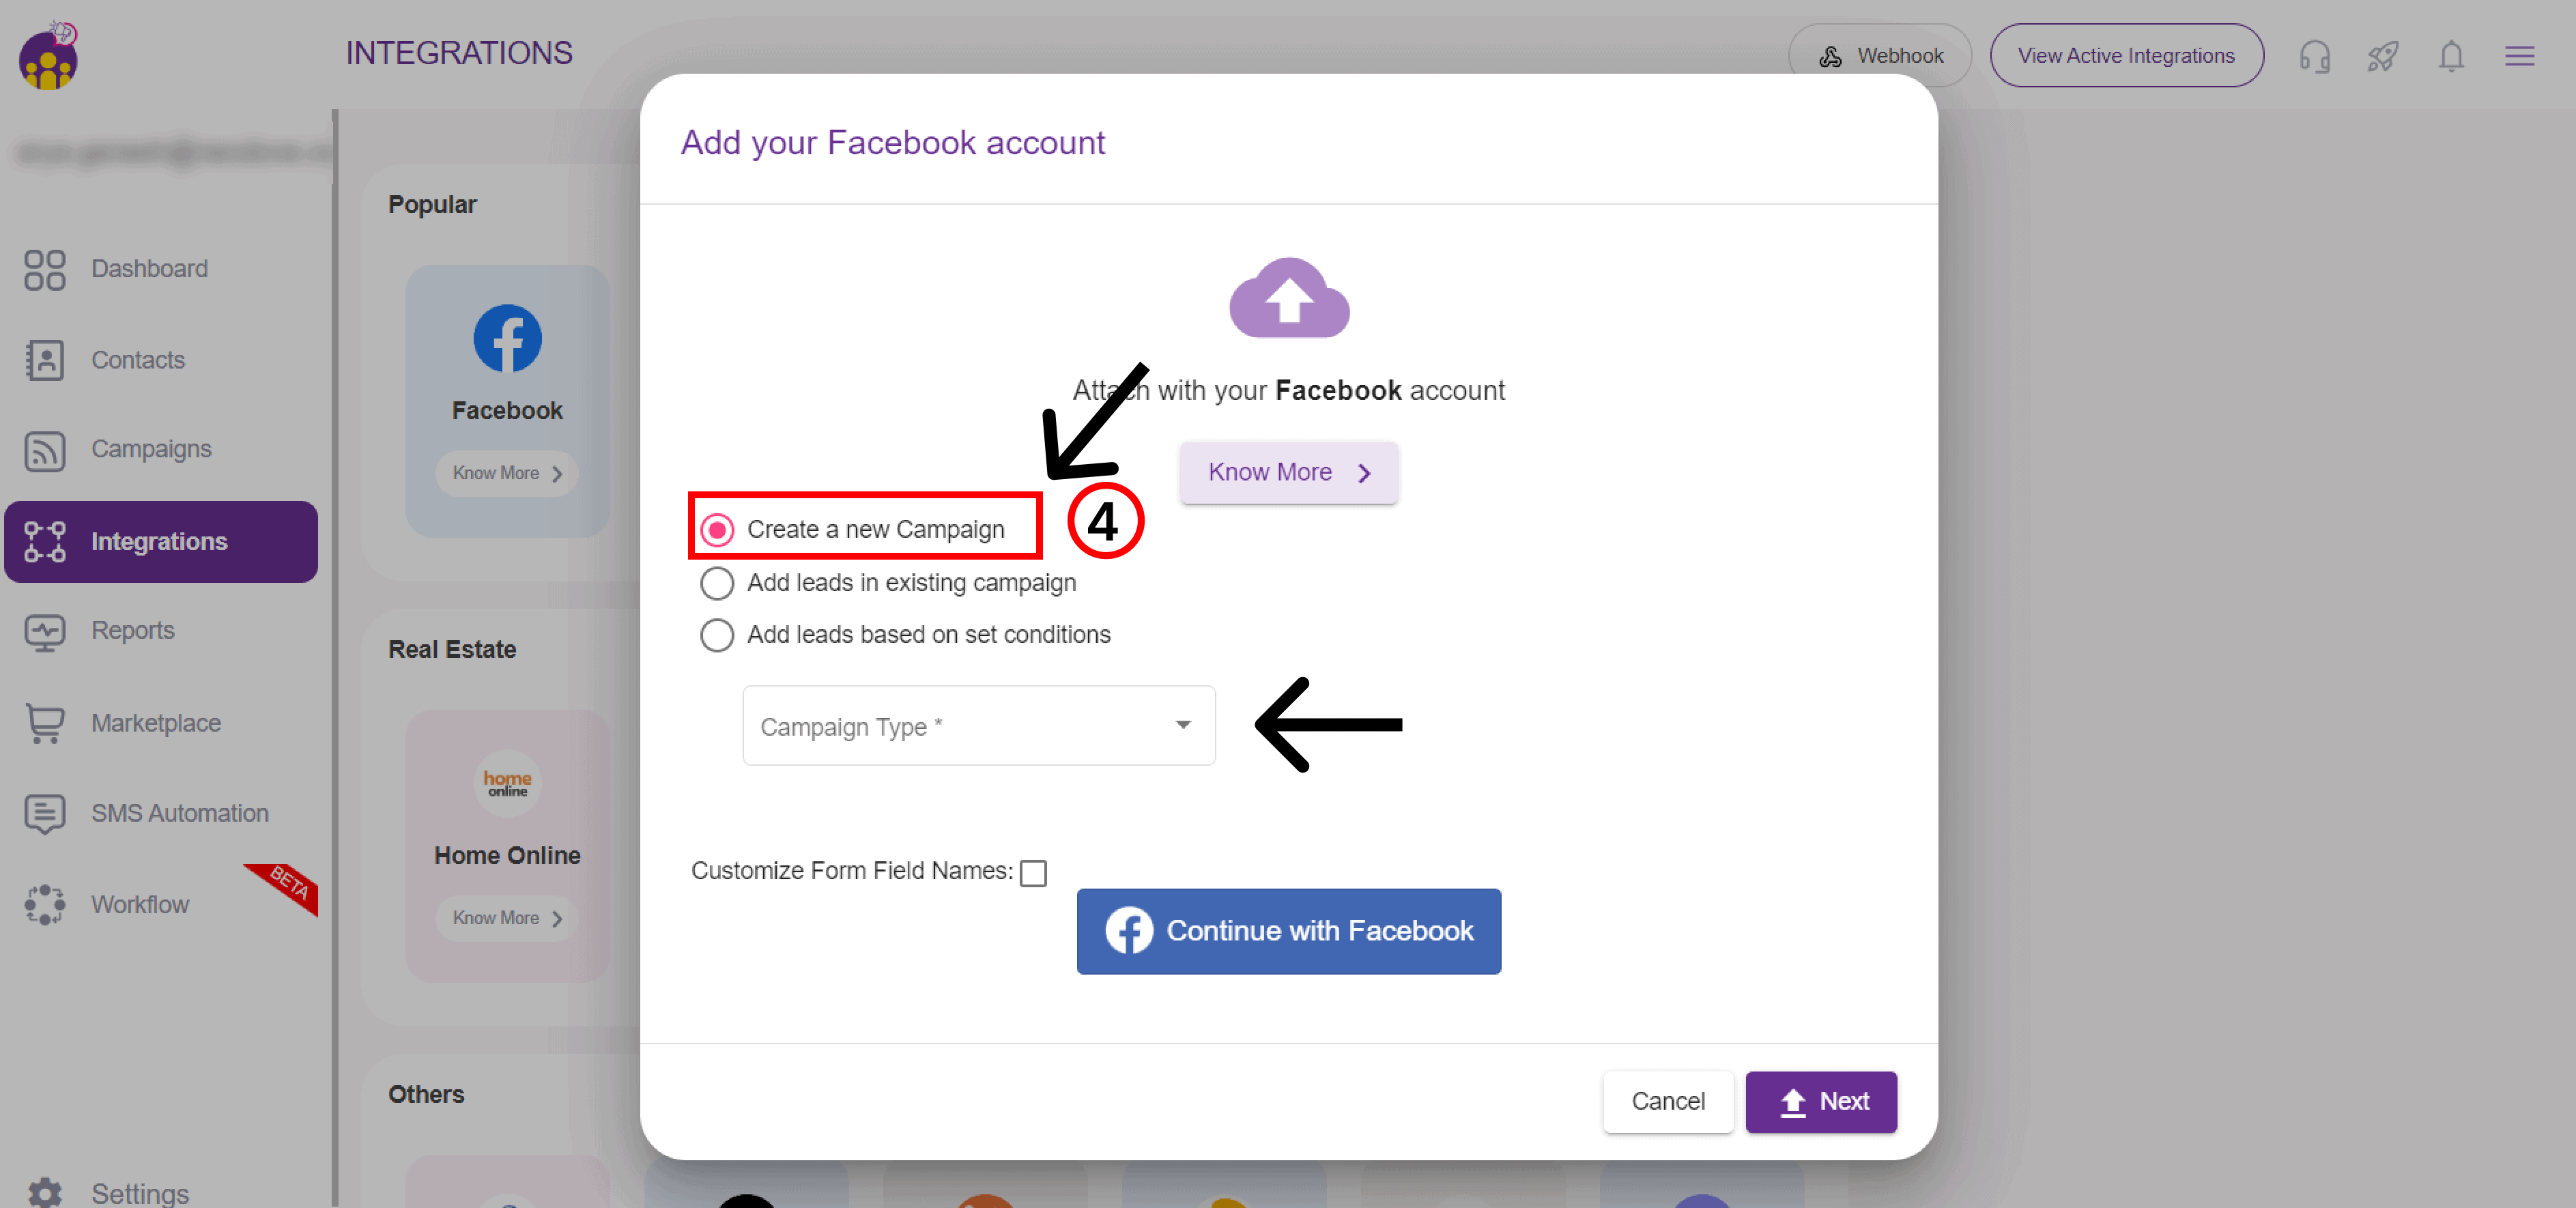
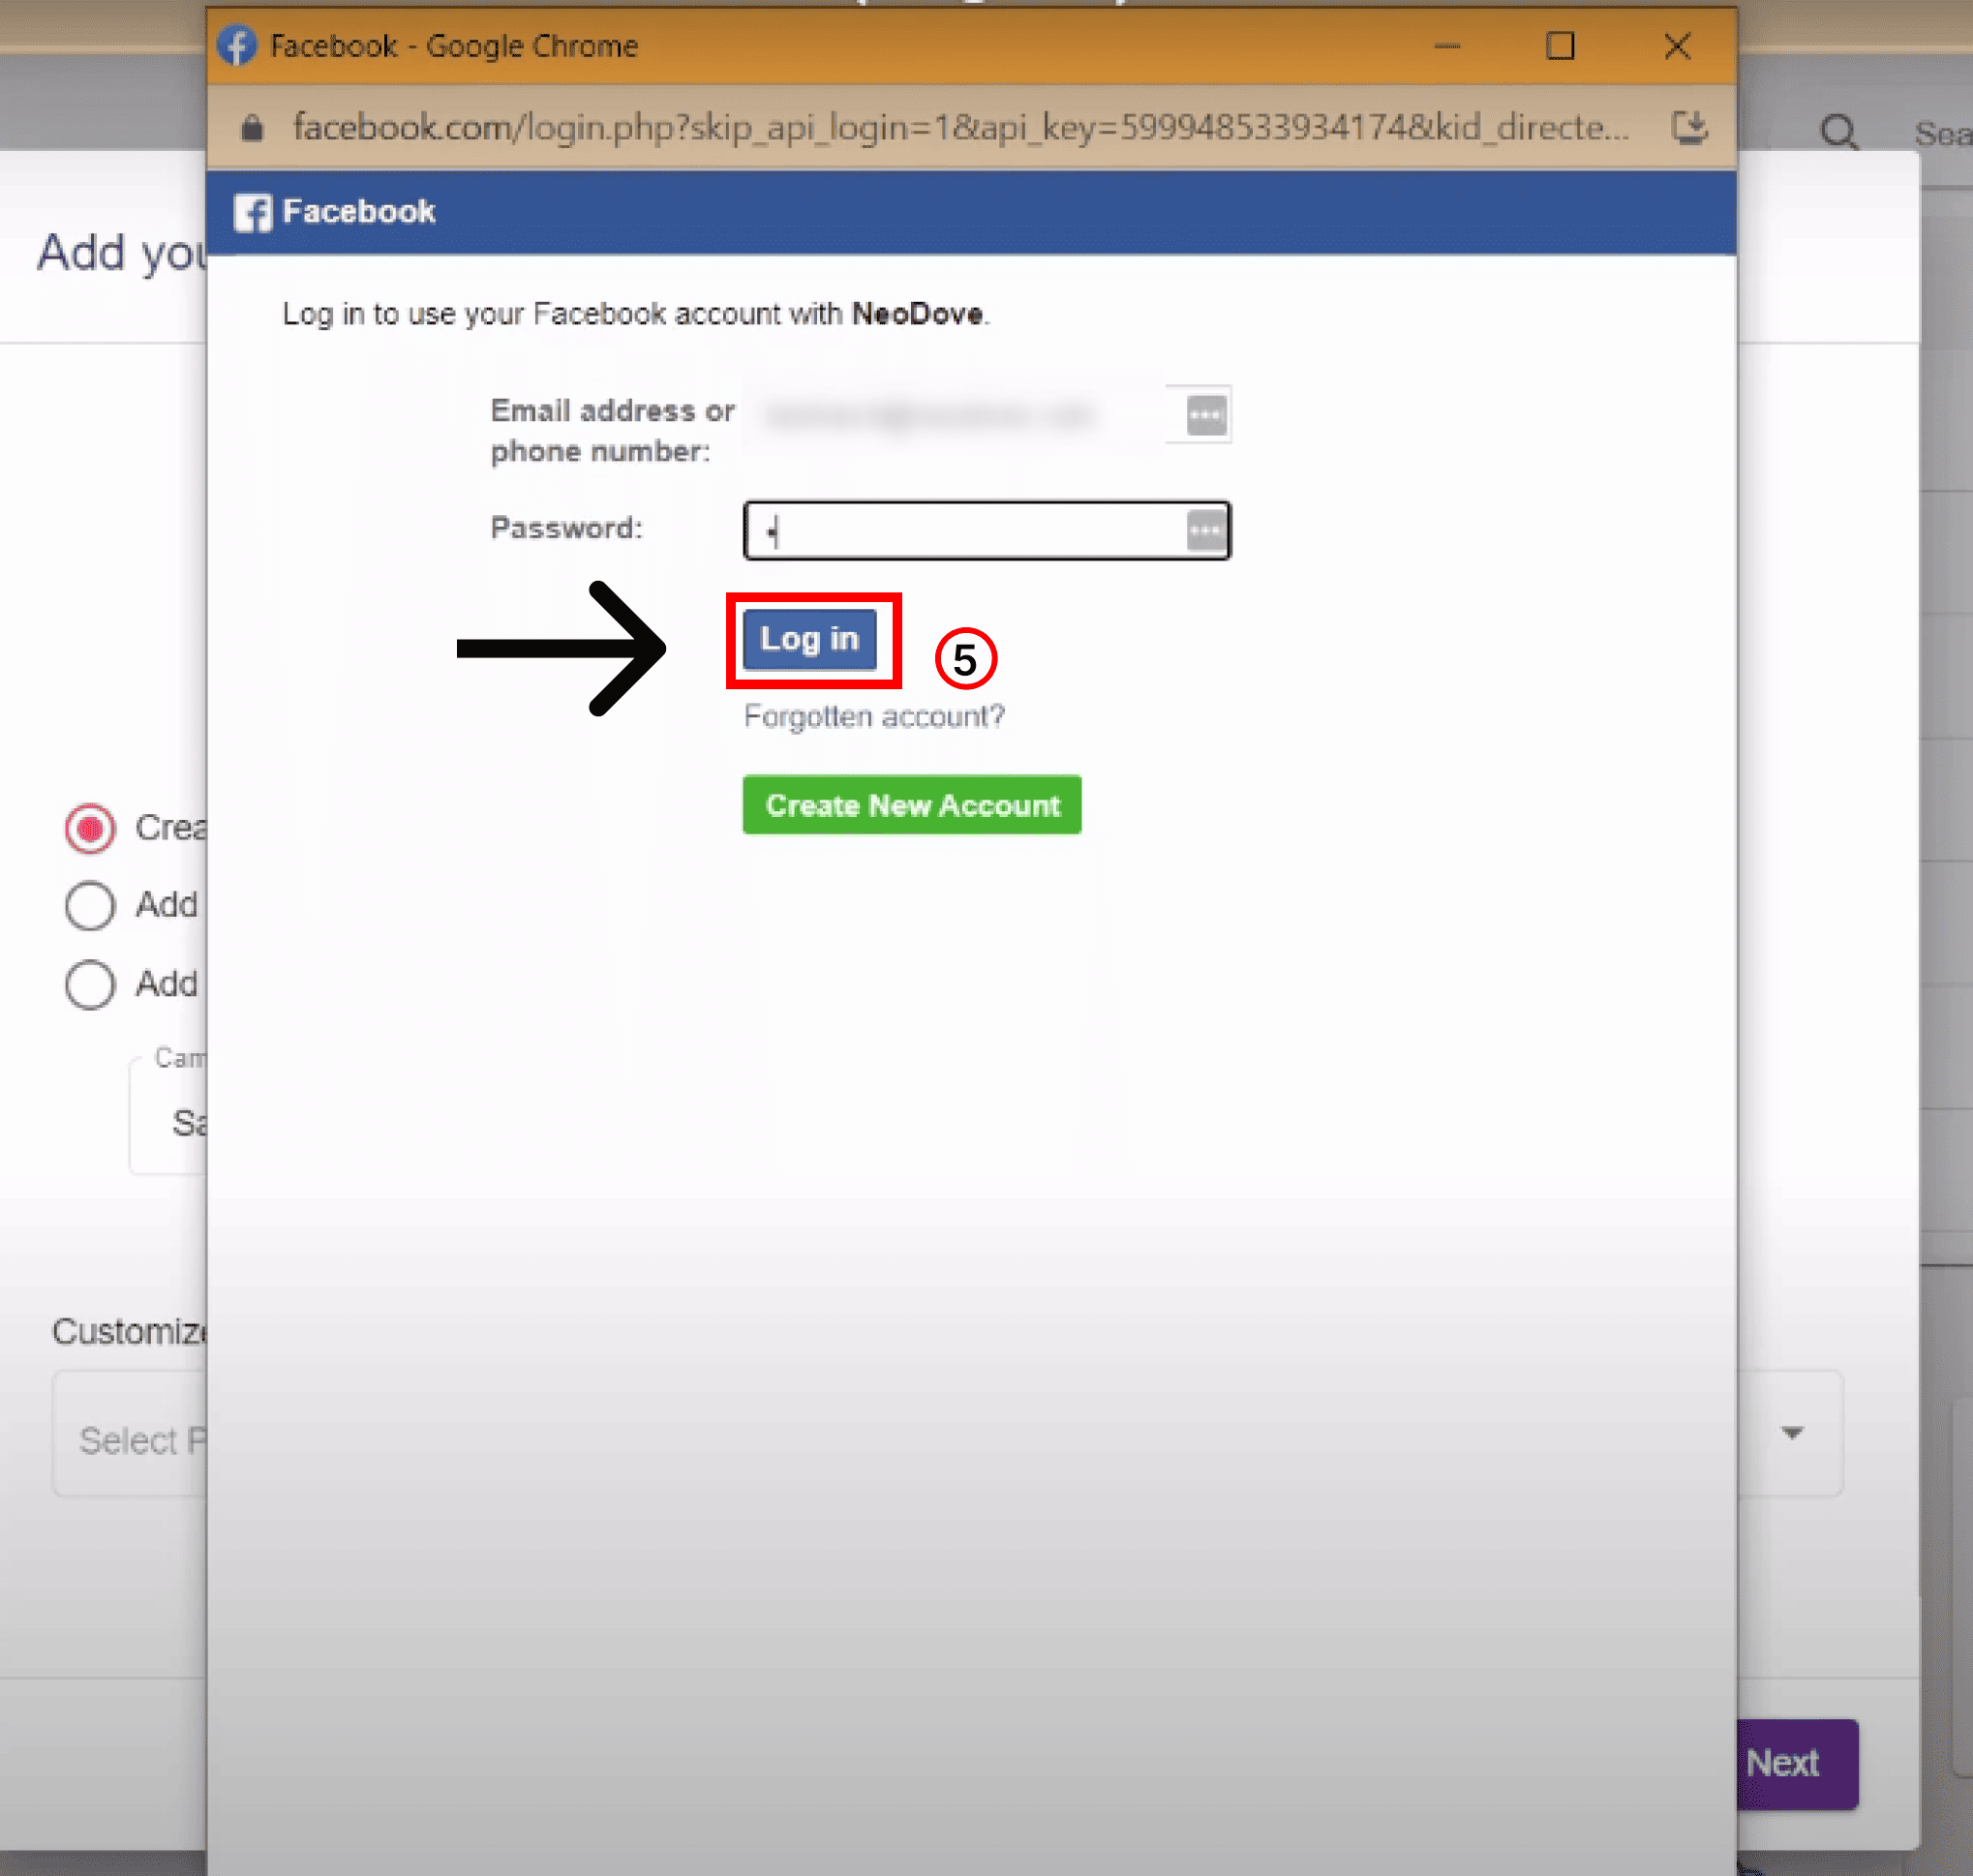
Then, click the ‘Continue with Facebook’ button. You will now be asked to log into your Facebook account.

After successfully logging in, you will find a drop down menu towards the bottom of the popup. Here, you will have to select the page from which you want to extract leads into NeoDove.
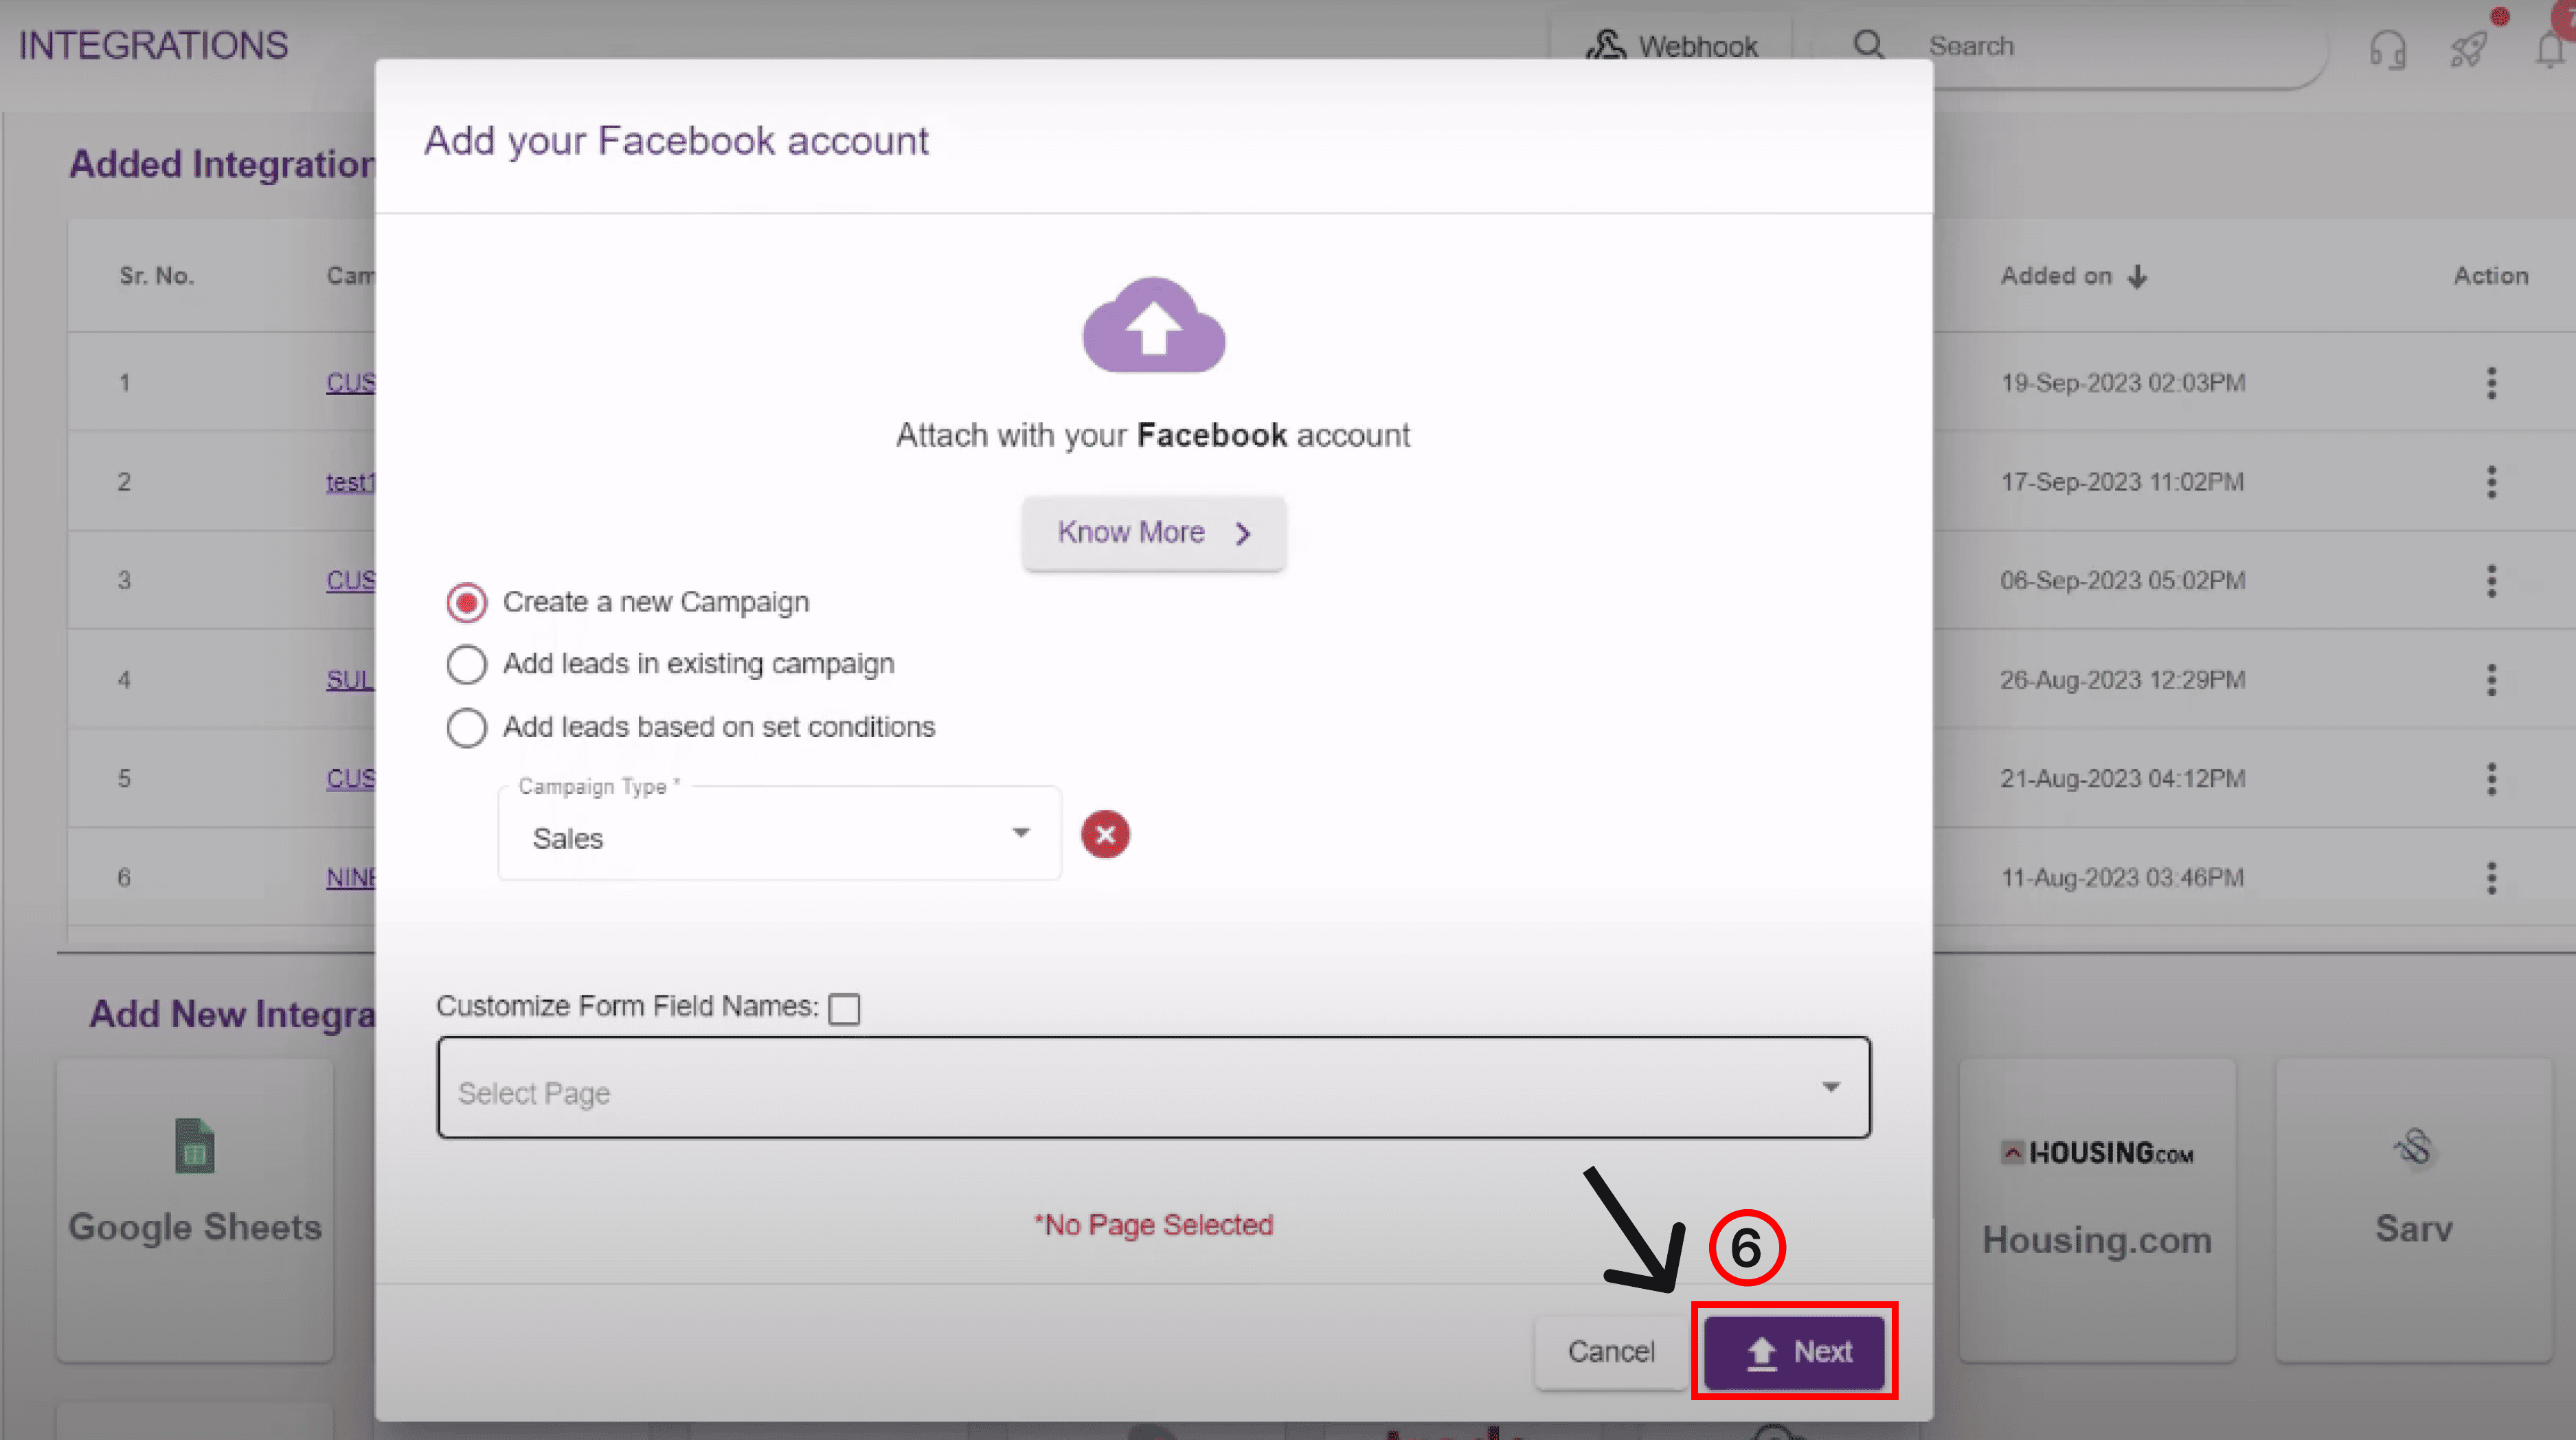
Then, click on Next.
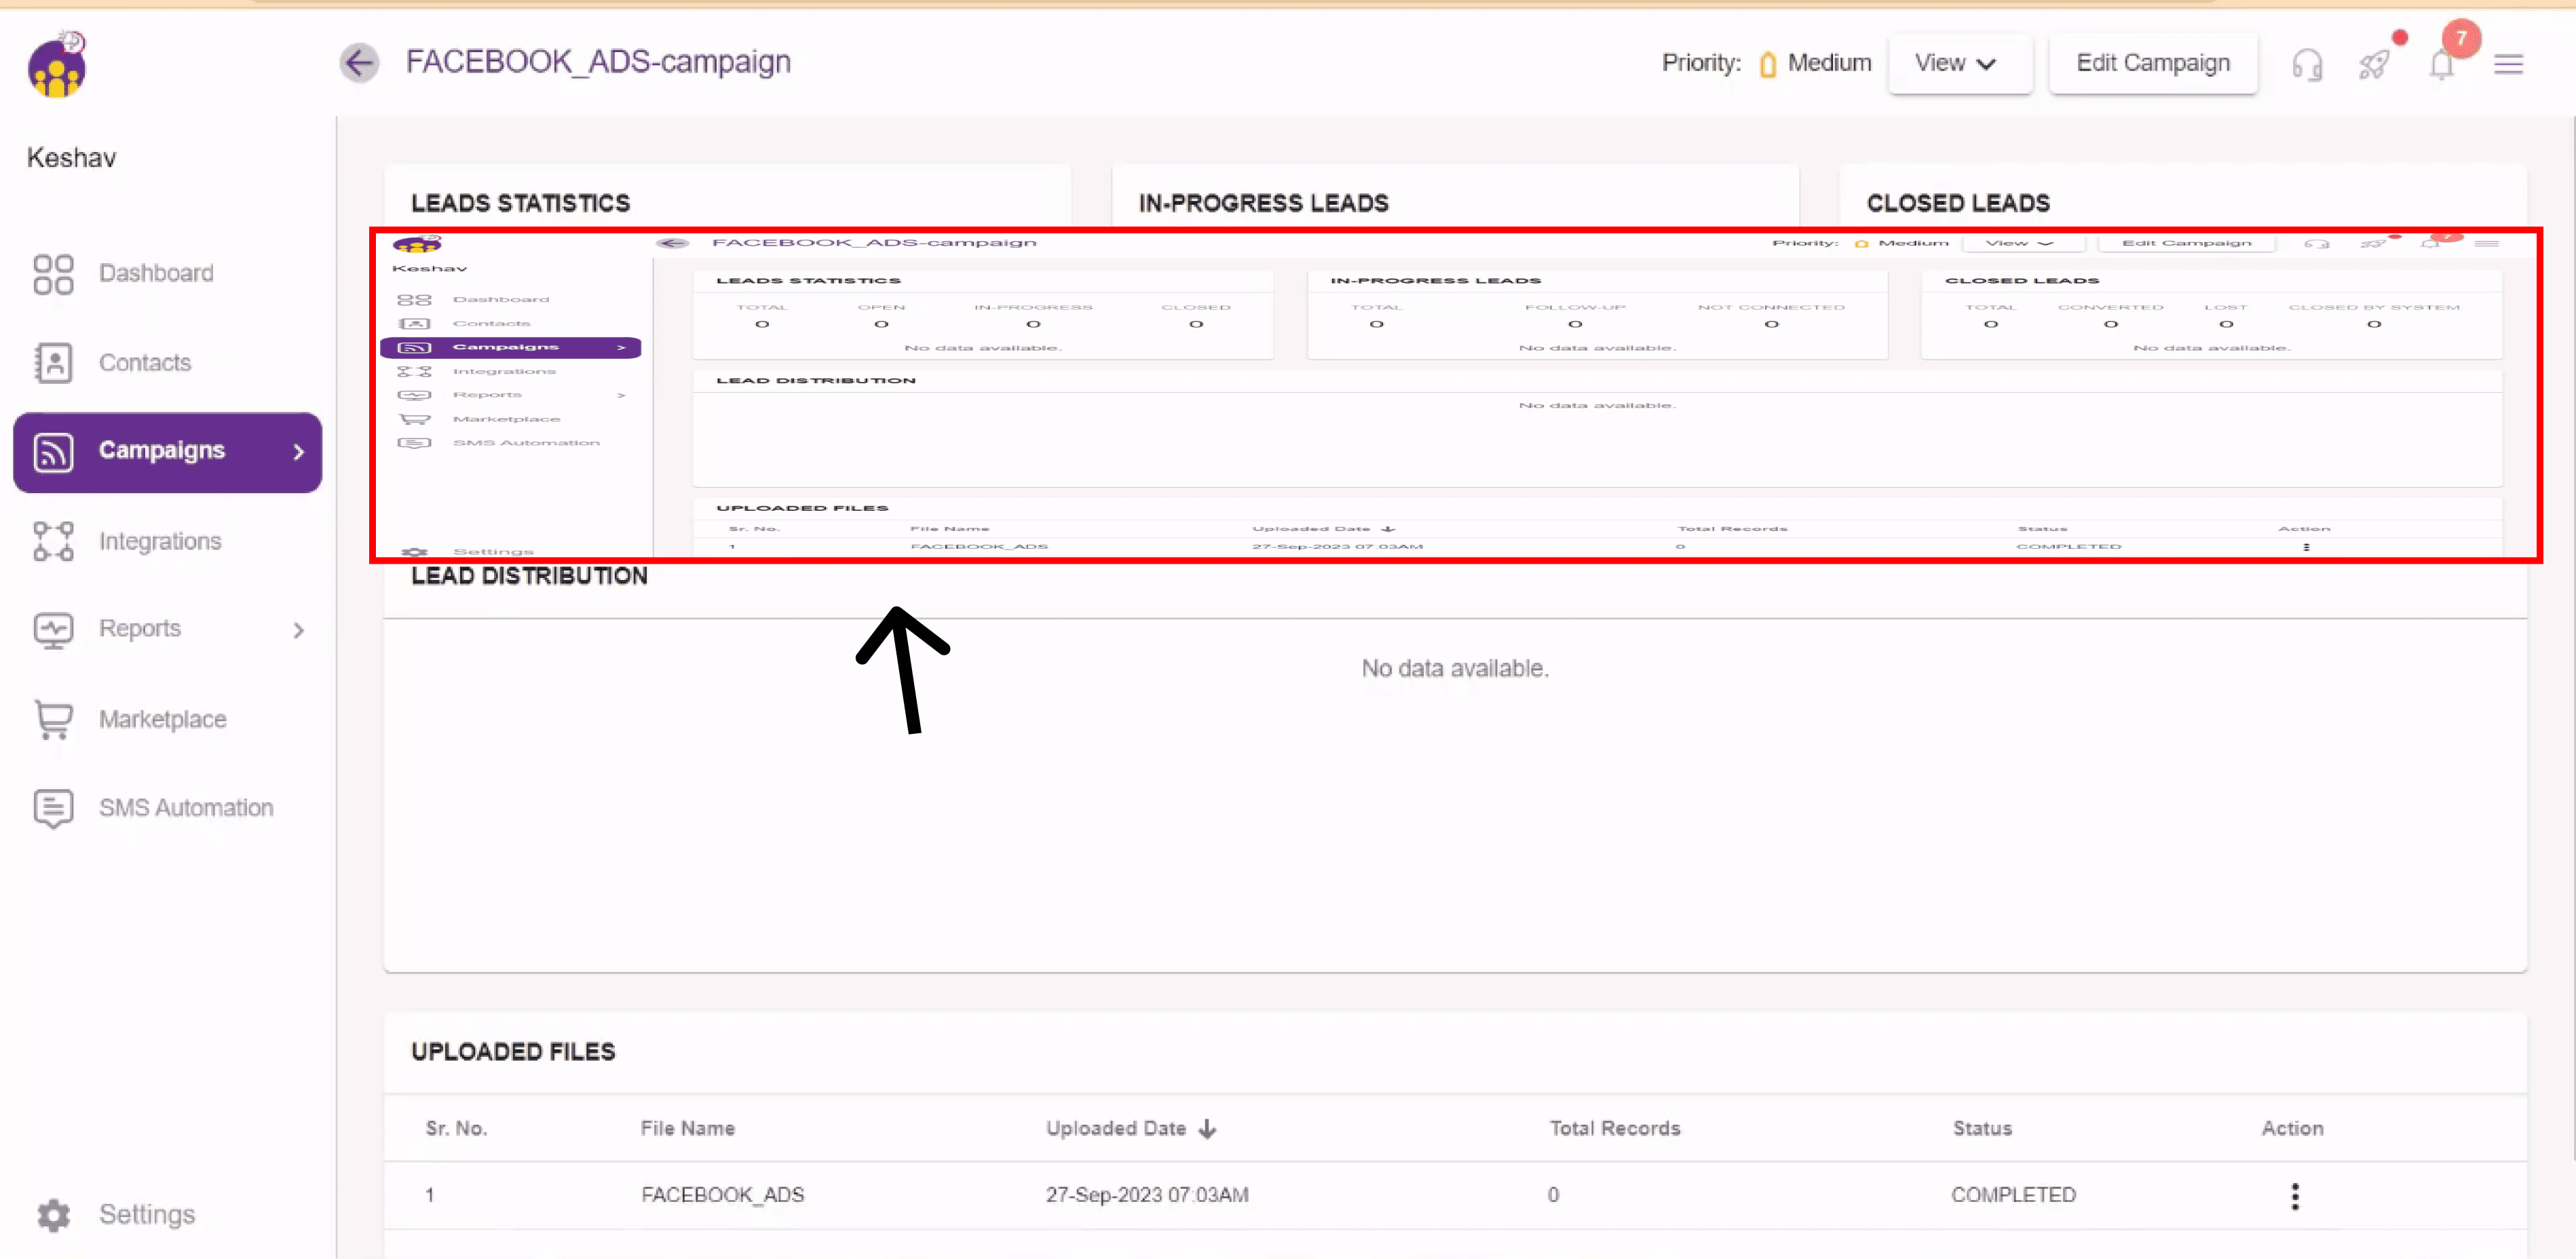
At the top of the ‘Added Integrations’ section, you will be able to see that the Facebook integration has been created. After clicking on your campaign link, you will then be redirected to your campaign. You will now need to test your integration to ensure you’ve connected Facebook leads to NeoDove successfully.
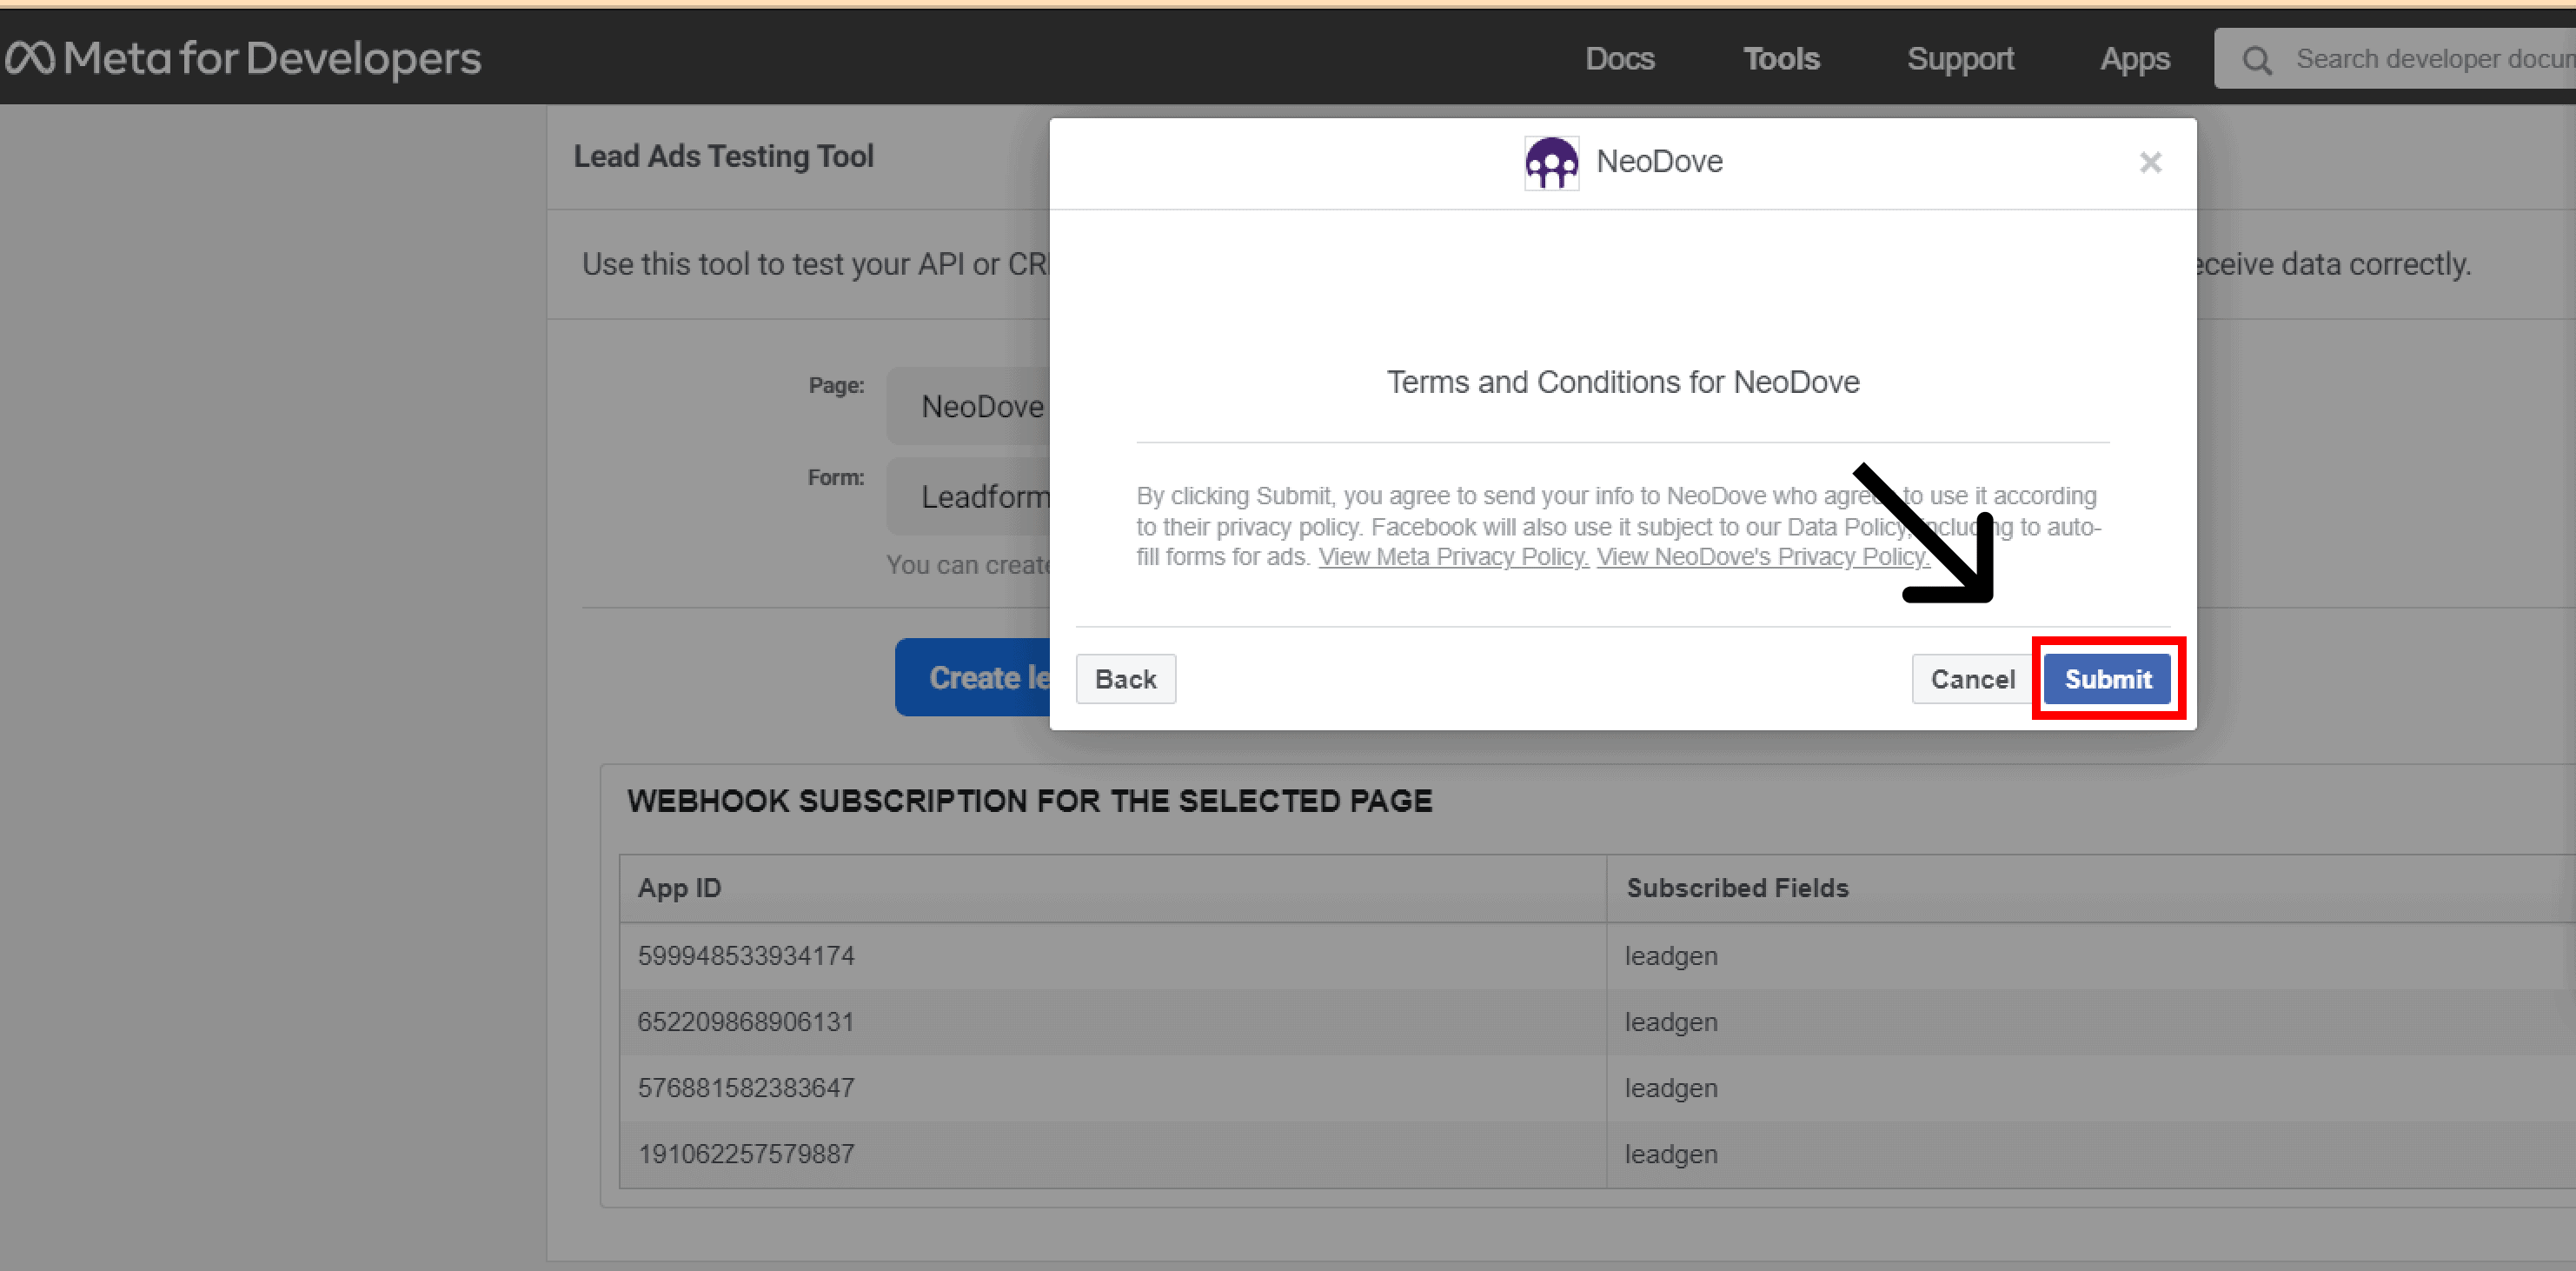
Go to developers.facebook.com/tools/lead-ads-testing. Here, you can test if your integration has been set up correctly. First, you must select your page.
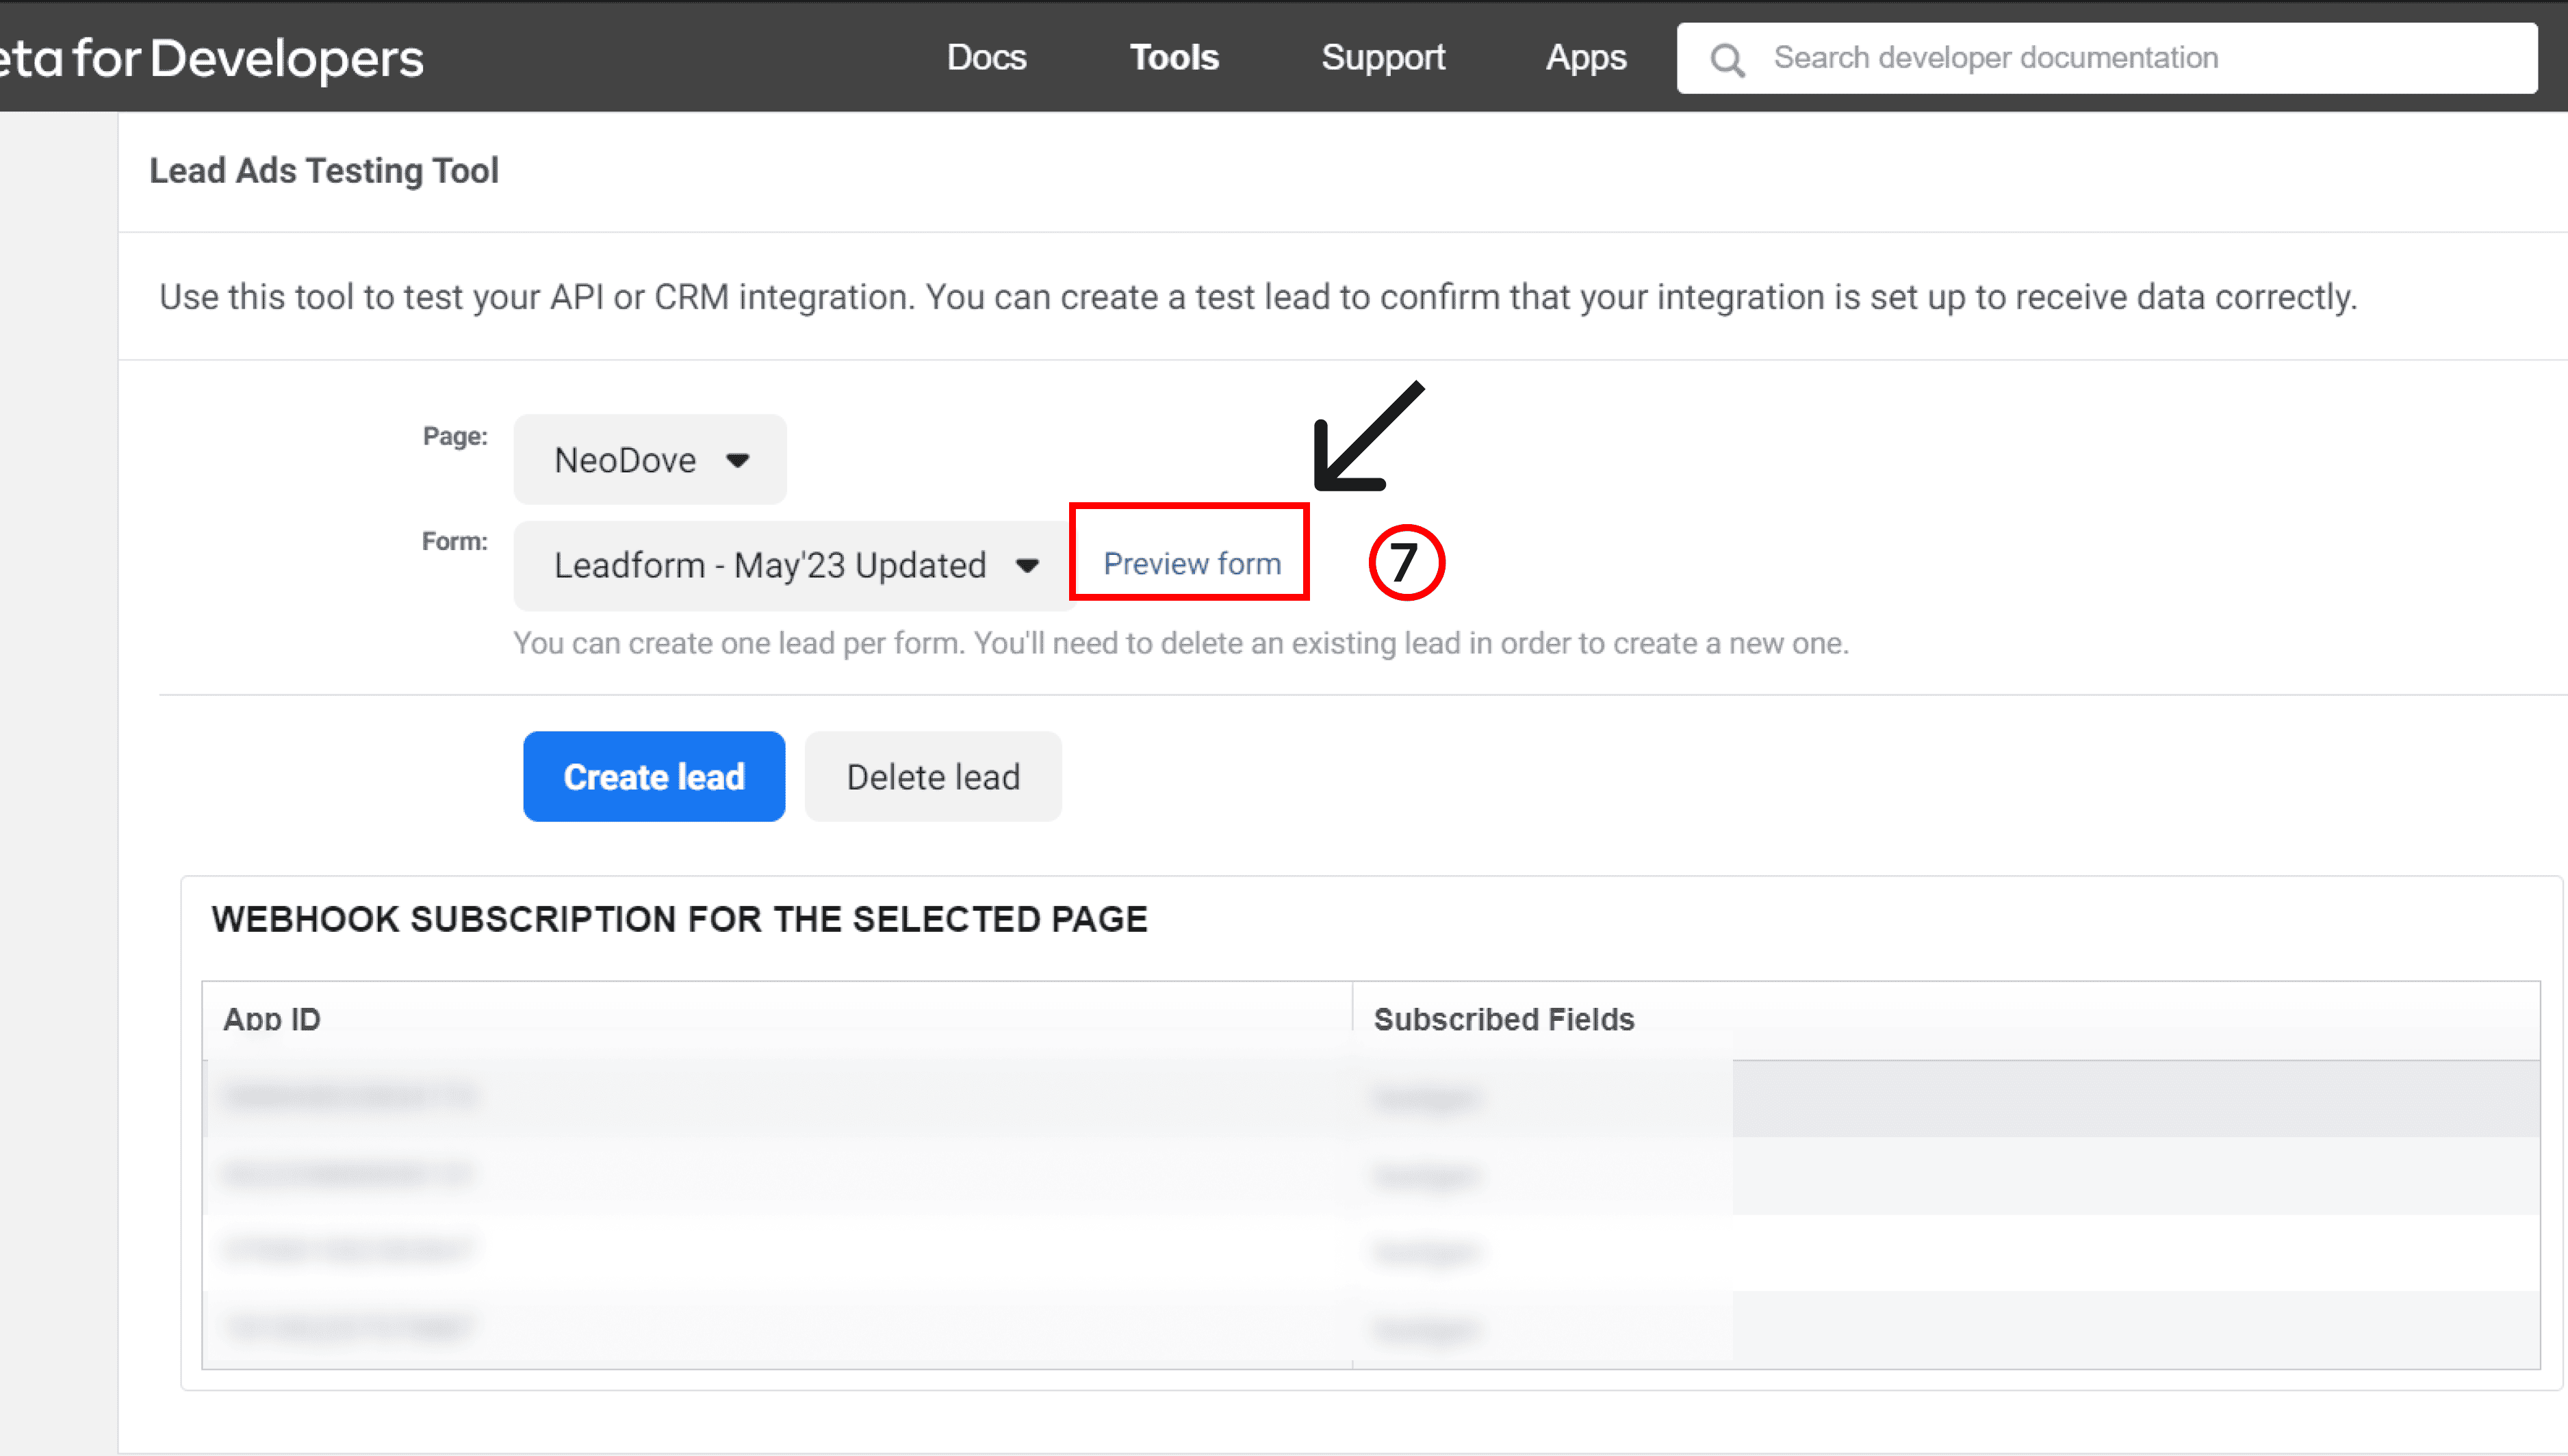
Then, click on ‘Preview form’.
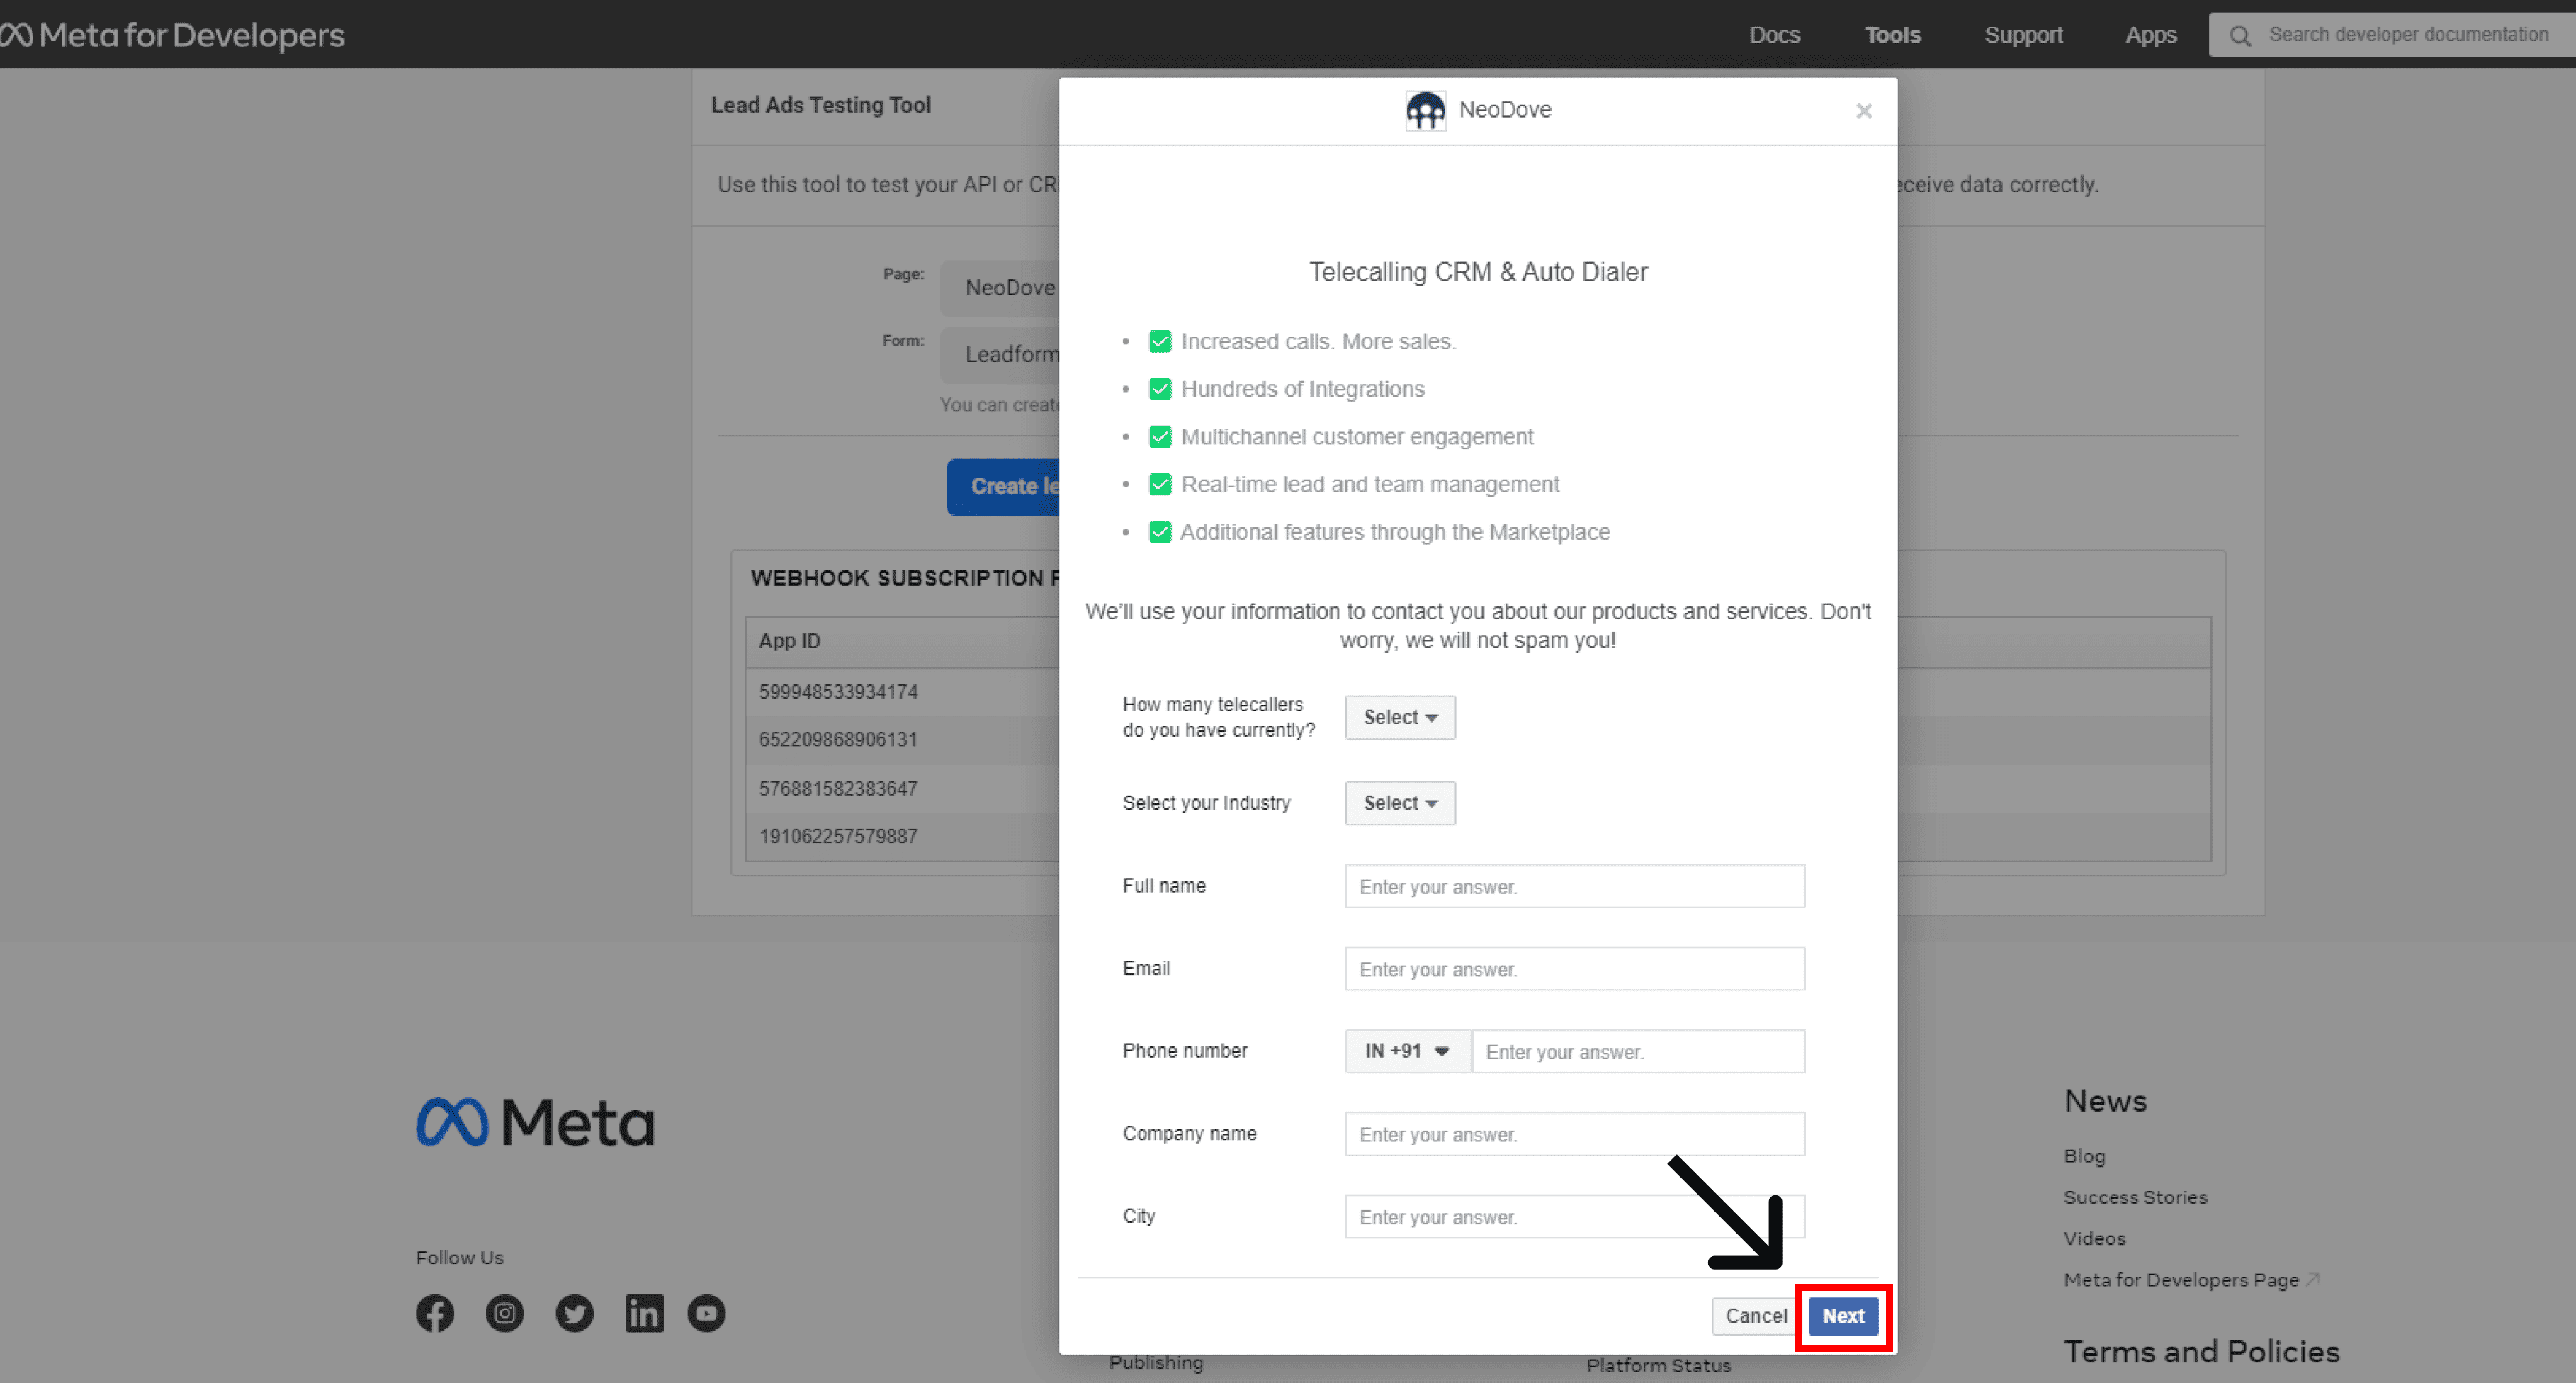
Fill in the form with details for the testing purpose. Click on Next and then tap the ‘Submit’ button.
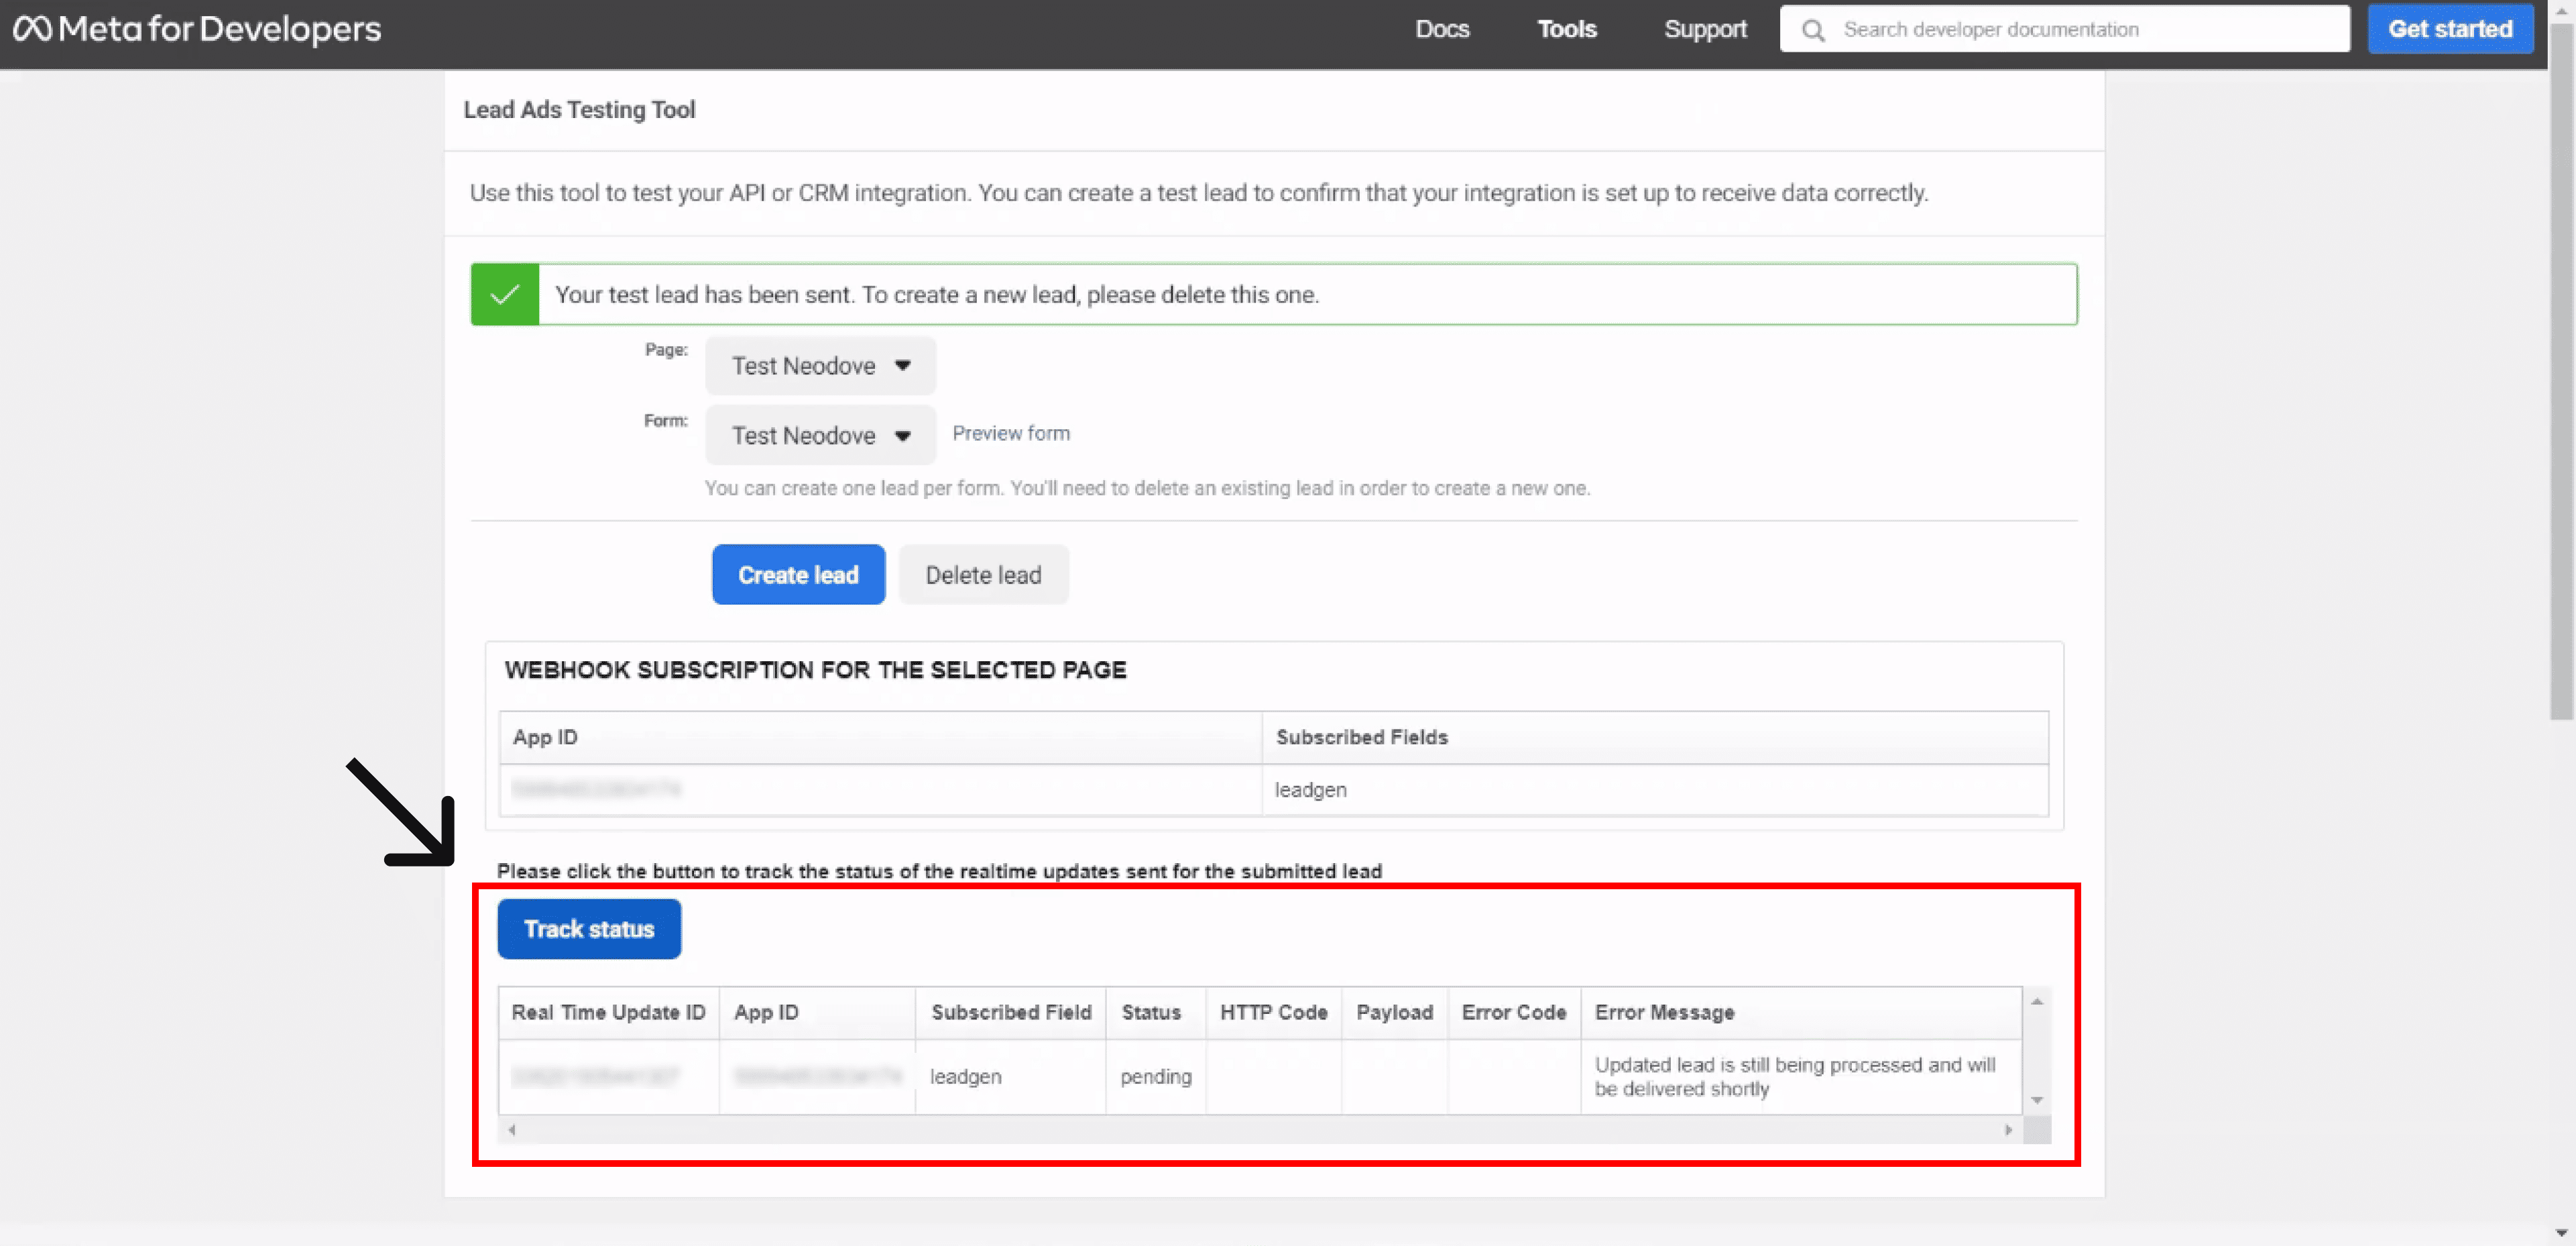
After submitting, click on ‘Track status’. This allows you to view the status of real time updates sent for the submitted leads.
Then, go back to your NeoDove page, and refresh the page.
If you’ve done the testing process correctly, you will 1 lead in open and total leads sections. You can click on this, to view your lead details.
Congratulations, you’ve connected Facebook leads to NeoDove CRM!
Also Read: How To Create A Facebook Business Page
Well then, you’ve now successfully connected Facebook leads to NeoDove CRM. This integration is key to a streamlined process for managing and nurturing all your leads. By following these straightforward steps, you’ve ensured that your Facebook leads are effortlessly imported into NeoDove.
By connecting Facebook leads to NeoDove, you can enhance your lead management and make it more efficient and organized. Moreover, NeoDove’s robust features will empower you to engage with your leads effectively, automate follow-ups, and gain valuable insights into your prospects’ interactions.
So, take advantage of this seamless connection, and maximize your lead nurturing efforts. Your journey to connected, engaged, and converted Facebook leads with NeoDove begins here!


Book a free demo and see how you can close more deals, faster!
![]()


95% business who use NeoDove report 3x more profits!
Happy Customers
107k reviews

These outcomes and beyond can be yours.
Lead Leakage
Increase in call attempts
More Engagement

FREE GUIDE
Get your copy of the ultimate guide to lead generation through telecalling (scripts included)